.Applicable plans
How does Freshchat work with Freshsales?
Freshchat is a modern messaging software for sales and customer engagement teams to talk to website visitors and in-product users. You can chat with your customers right when they are on your website or product. The moment a website visitor initiates a chat you are notified inside Freshsales. You can reply to them via the Freshchat widget present in Freshsales.

How is it helpful?
After connecting your Freshchat account with Freshsales, you may:
- Chat with those who visit your website and initiate a chat conversation.
- Add them as Leads or Contacts in Freshsales
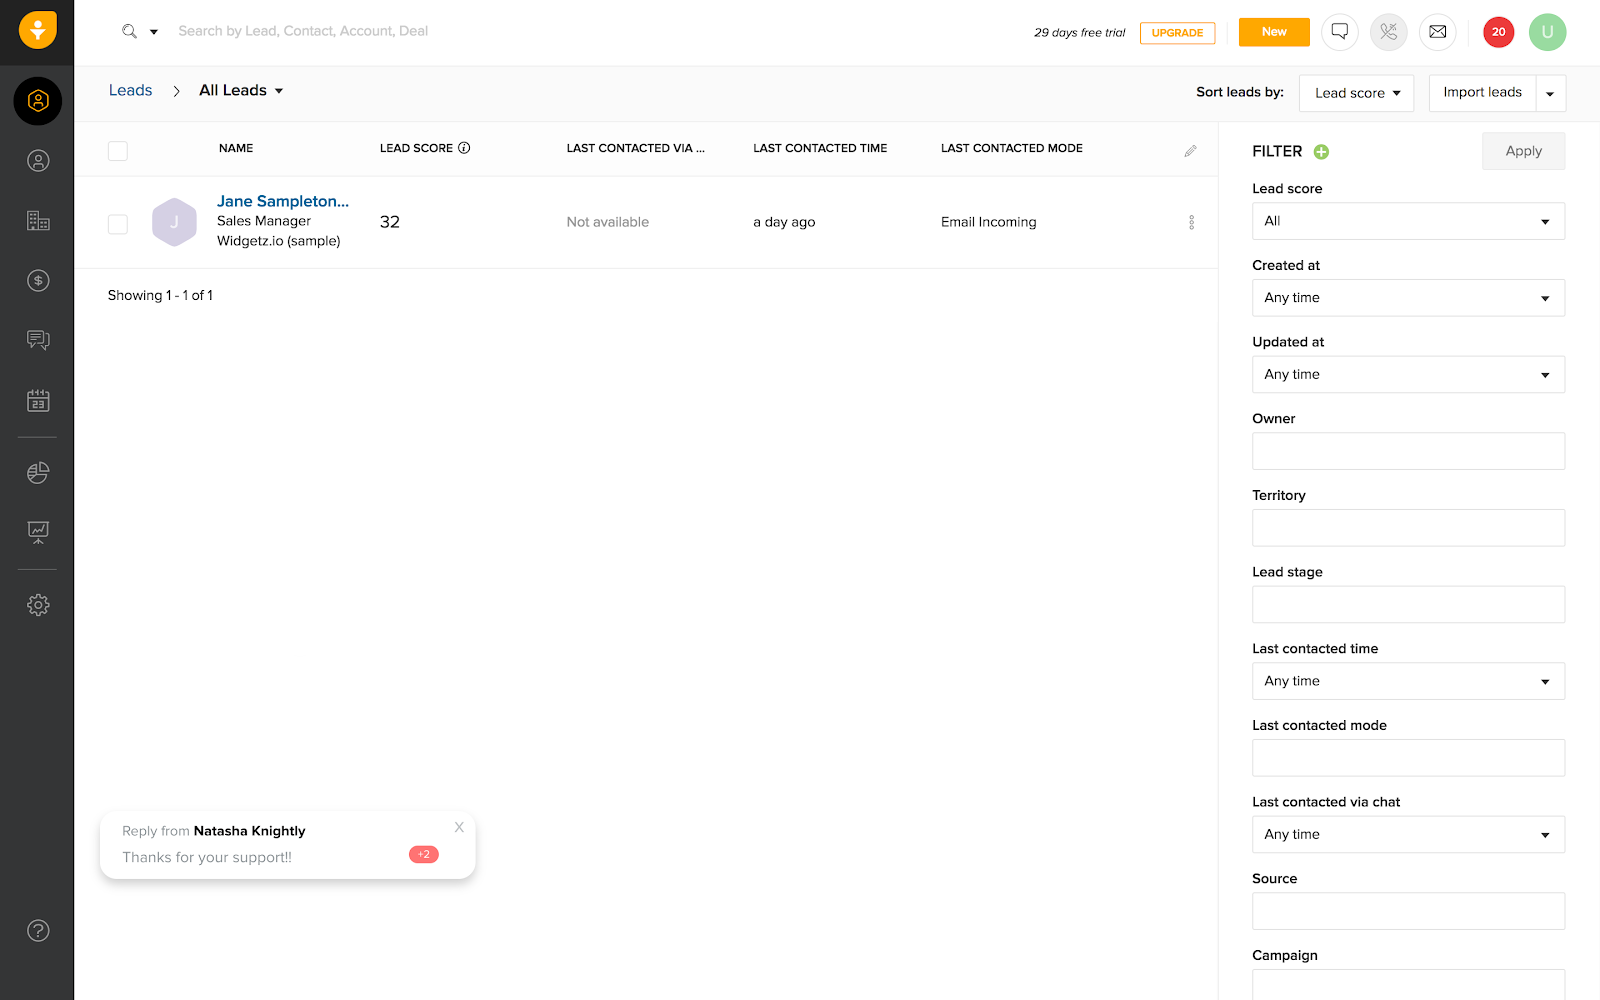
- Know if your Leads or Contacts are online
- Plan your future conversations based on the chat history
How to configure Freshsales-Freshchat integration?
Who can configure? - Needs to be an admin of both Freshsales and Freshchat account.
Steps to configure:
- In Freshsales, log in as an Admin and go to Admin Settings > Apps.

- Connect to Freshchat integration.
- You are directed to your Freshsales integrations page in your Freshchat account (if you are already logged in).
- Else, login and get directed to this page.
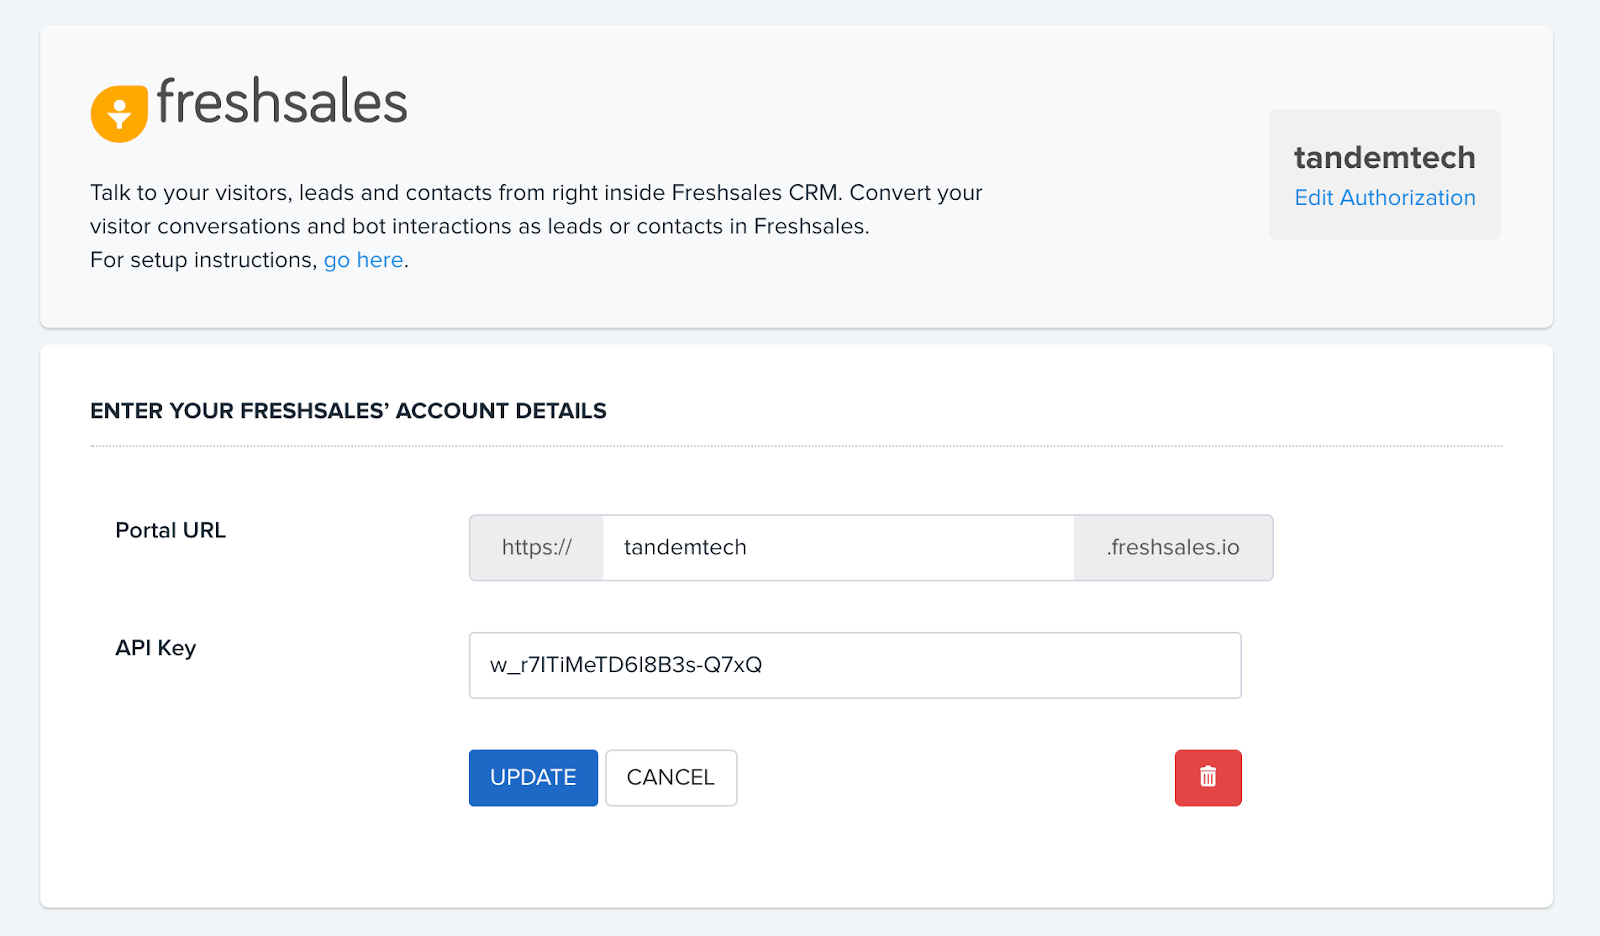
- Now, you need to authorize your Freshsales account.
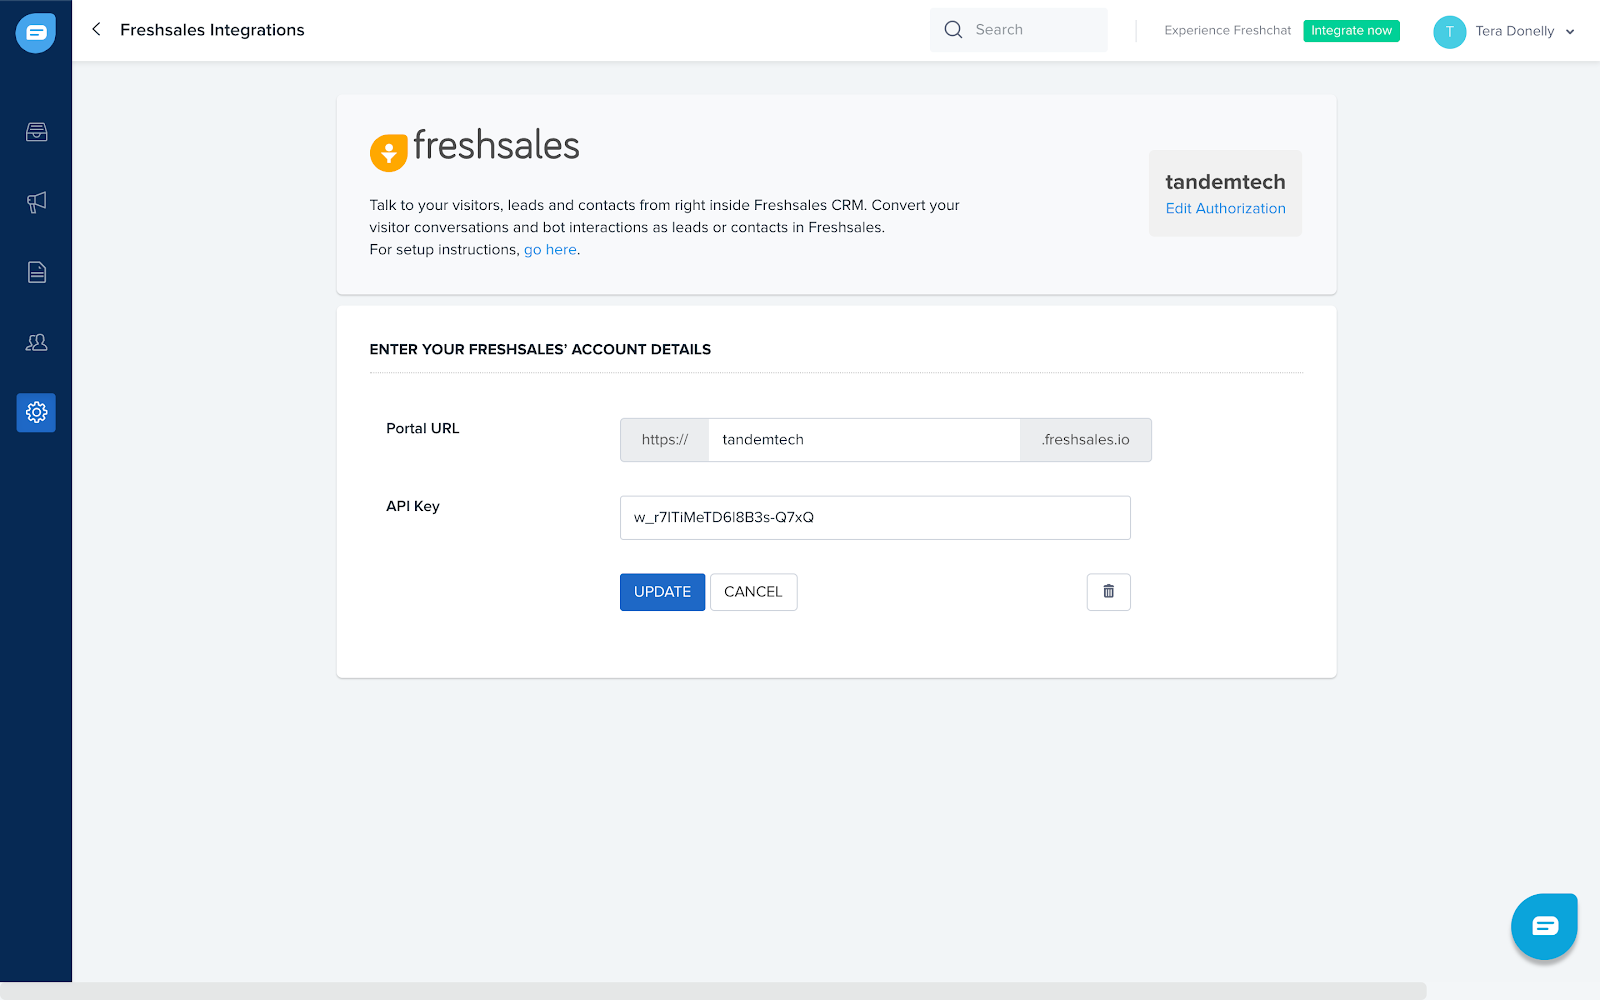
- Enter your Freshsales account’s API key and your portal’s URL(domain name).
- Enter your Freshsales domain’s URL
Ex: Freshsales account URL - tandemtech.freshsales.io
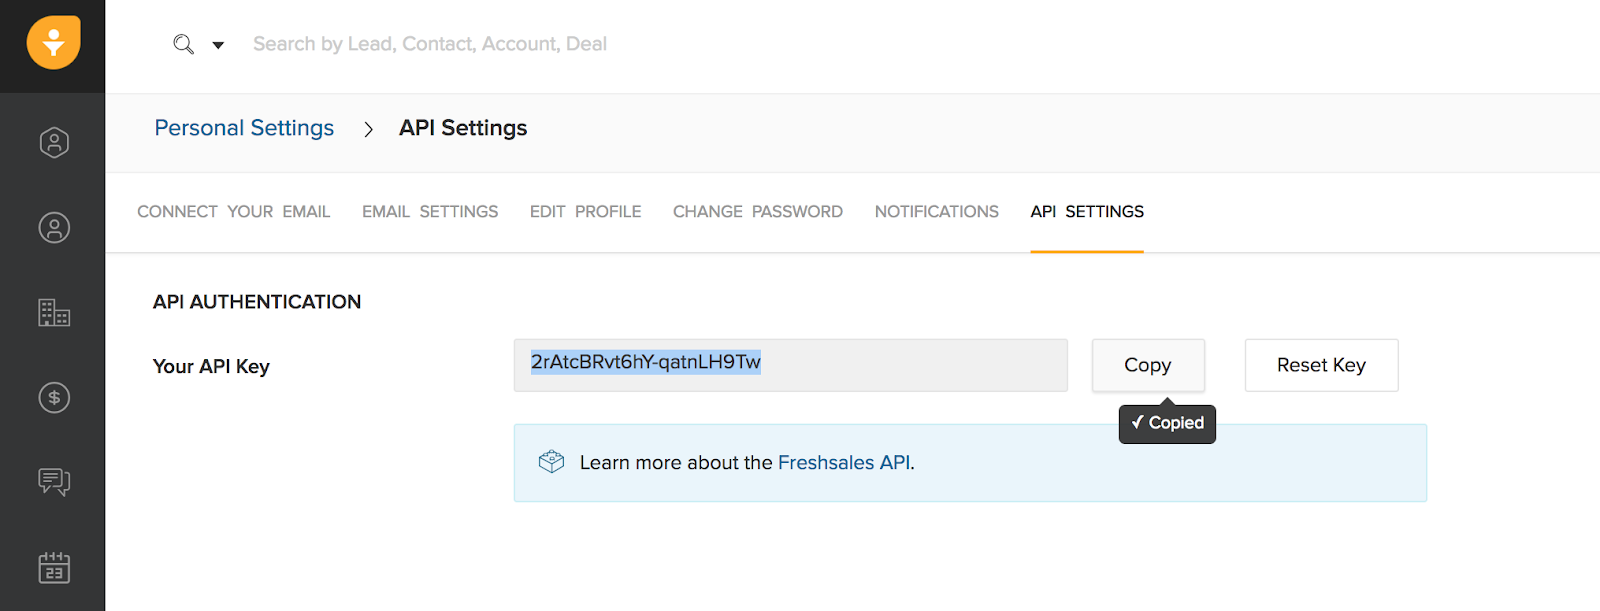
Portal URL - tandemtech - To get your Freshsales account’s API key: Profile picture > Profile Settings > API Settings
- Enter your Freshsales domain’s URL
3. Copy your API key
4. Save your settings to enable the integration.
- After this, you are directed to the integration’s Settings page.
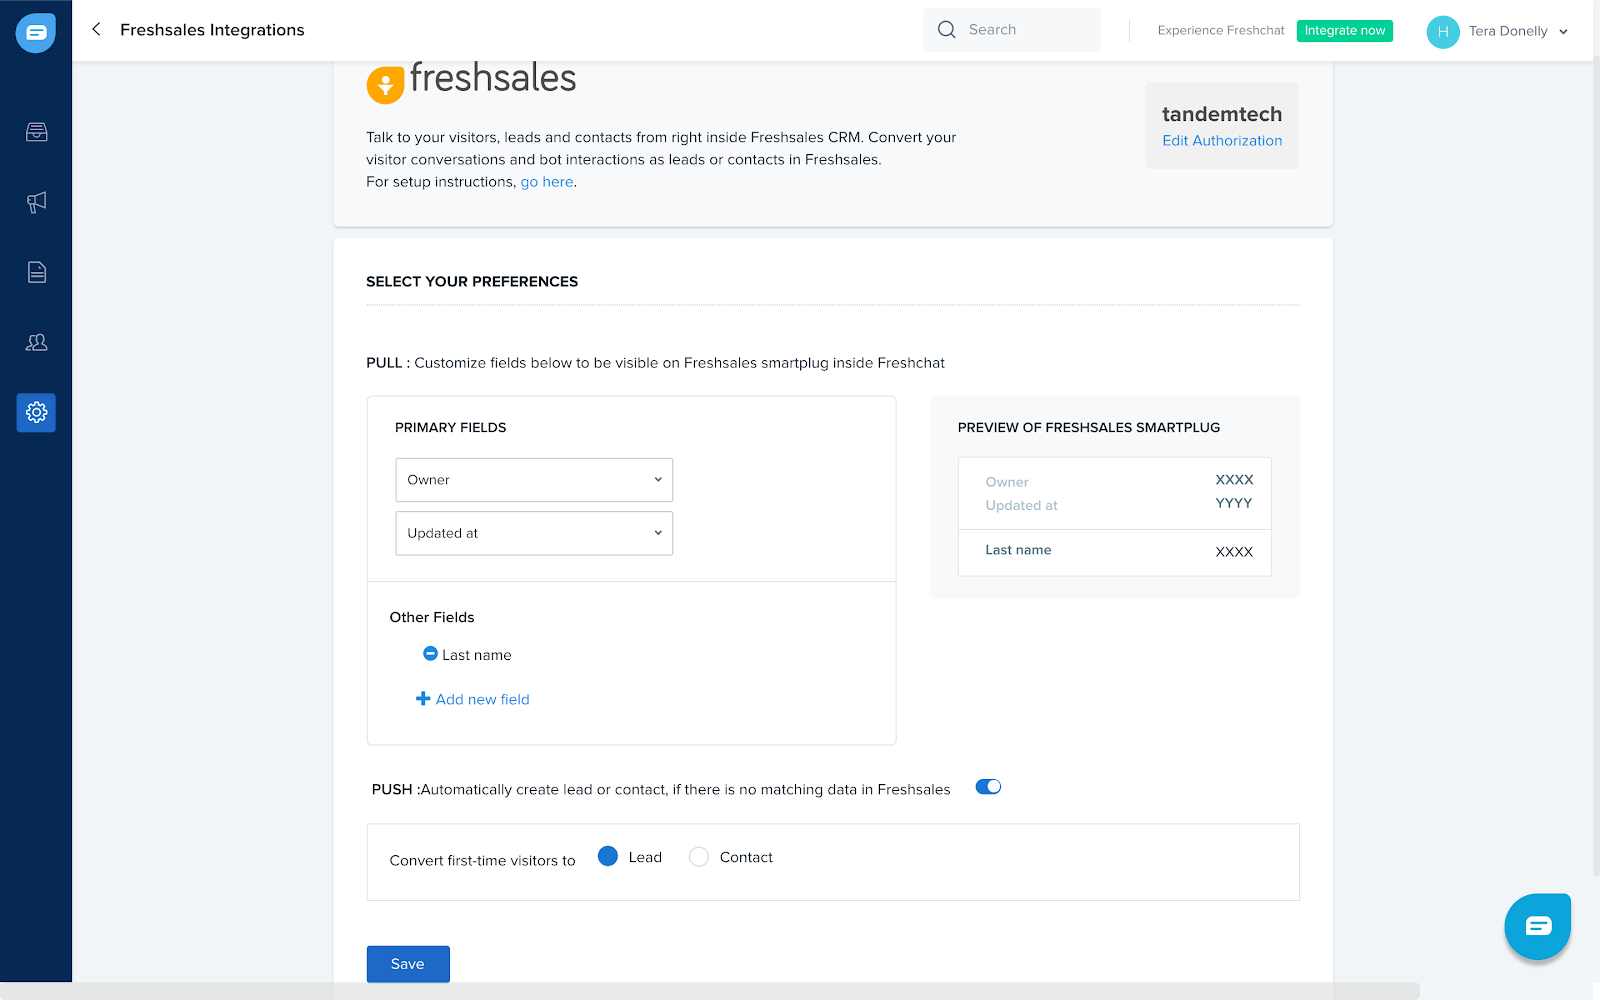
- Here, you may add the following details:
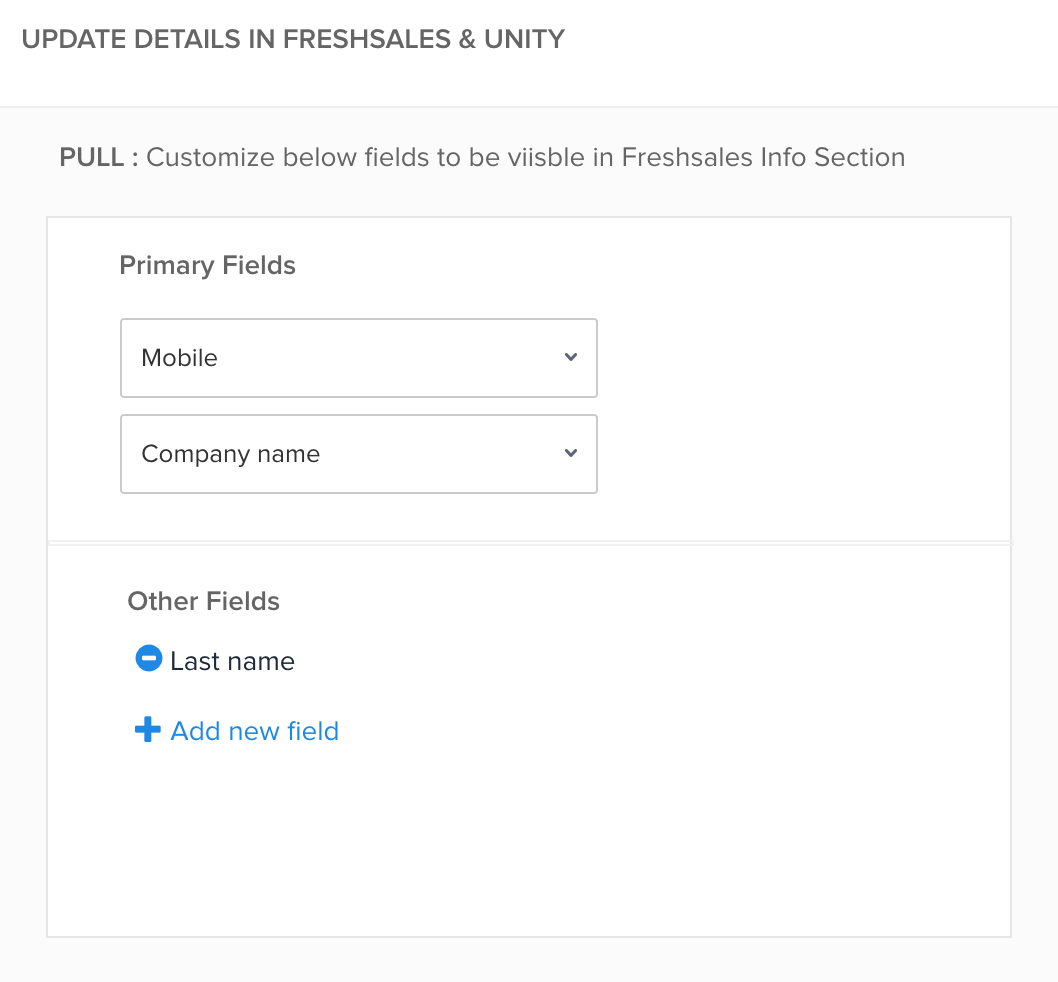
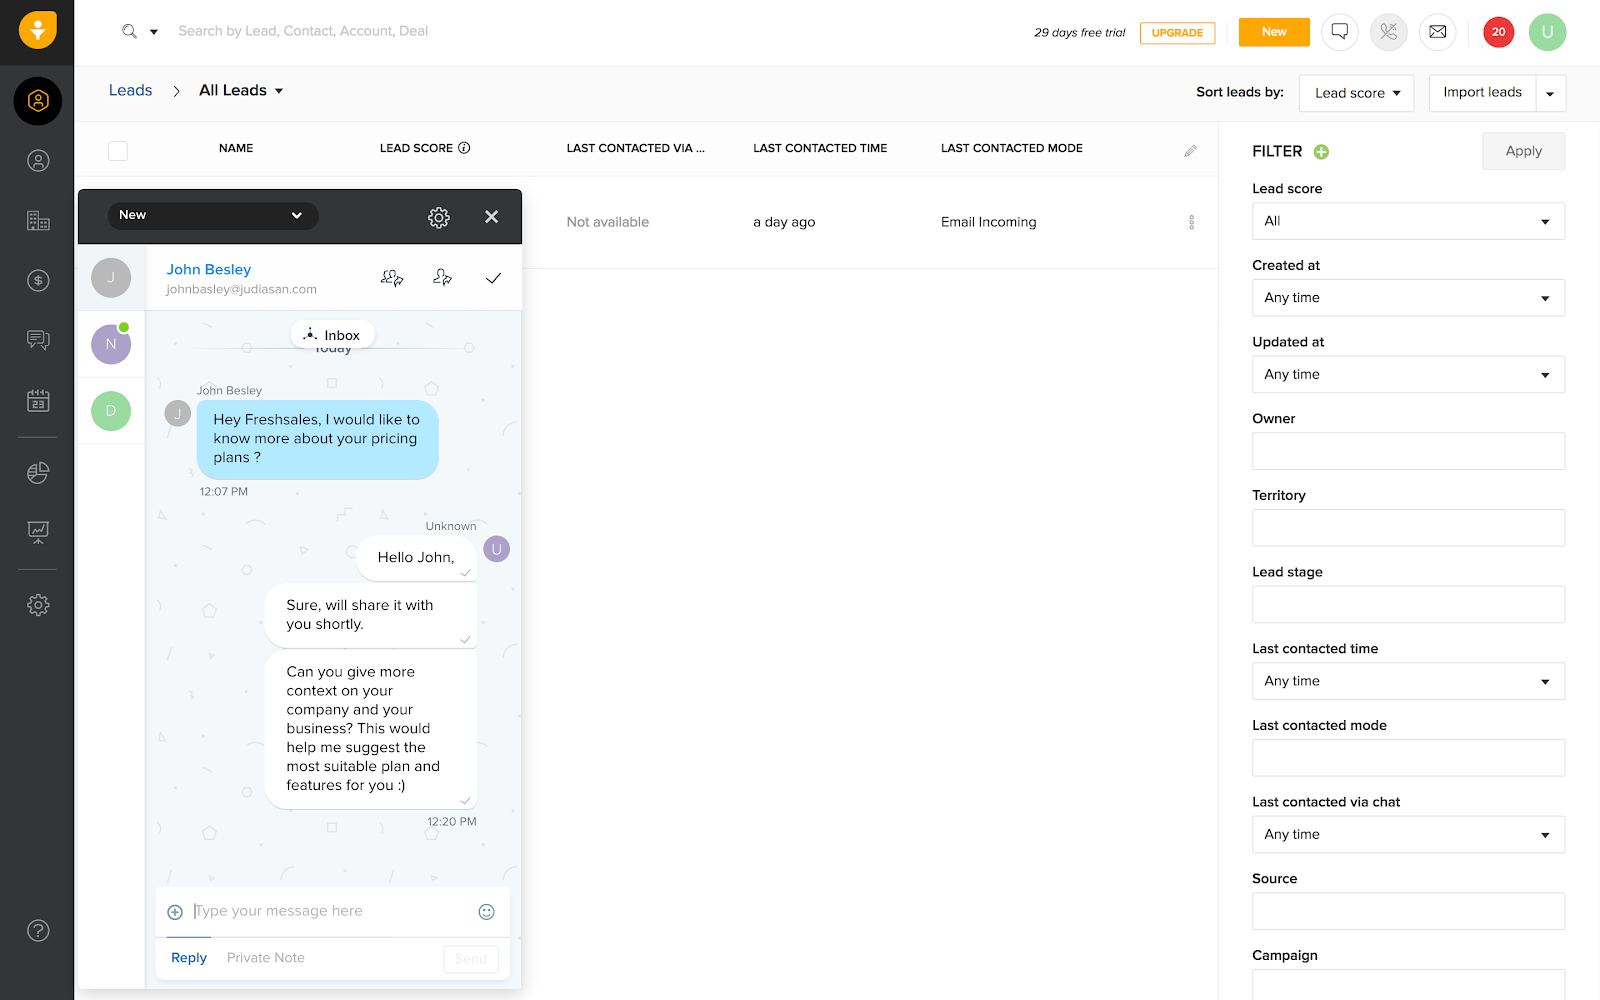
(a) Primary fields: What information of the Lead or Contact needs to be shown on clicking their name in the Freshchat widget. By default, it’s prefilled with Owner & Updated at fields. You may change these or add more fields(Other fields) too.
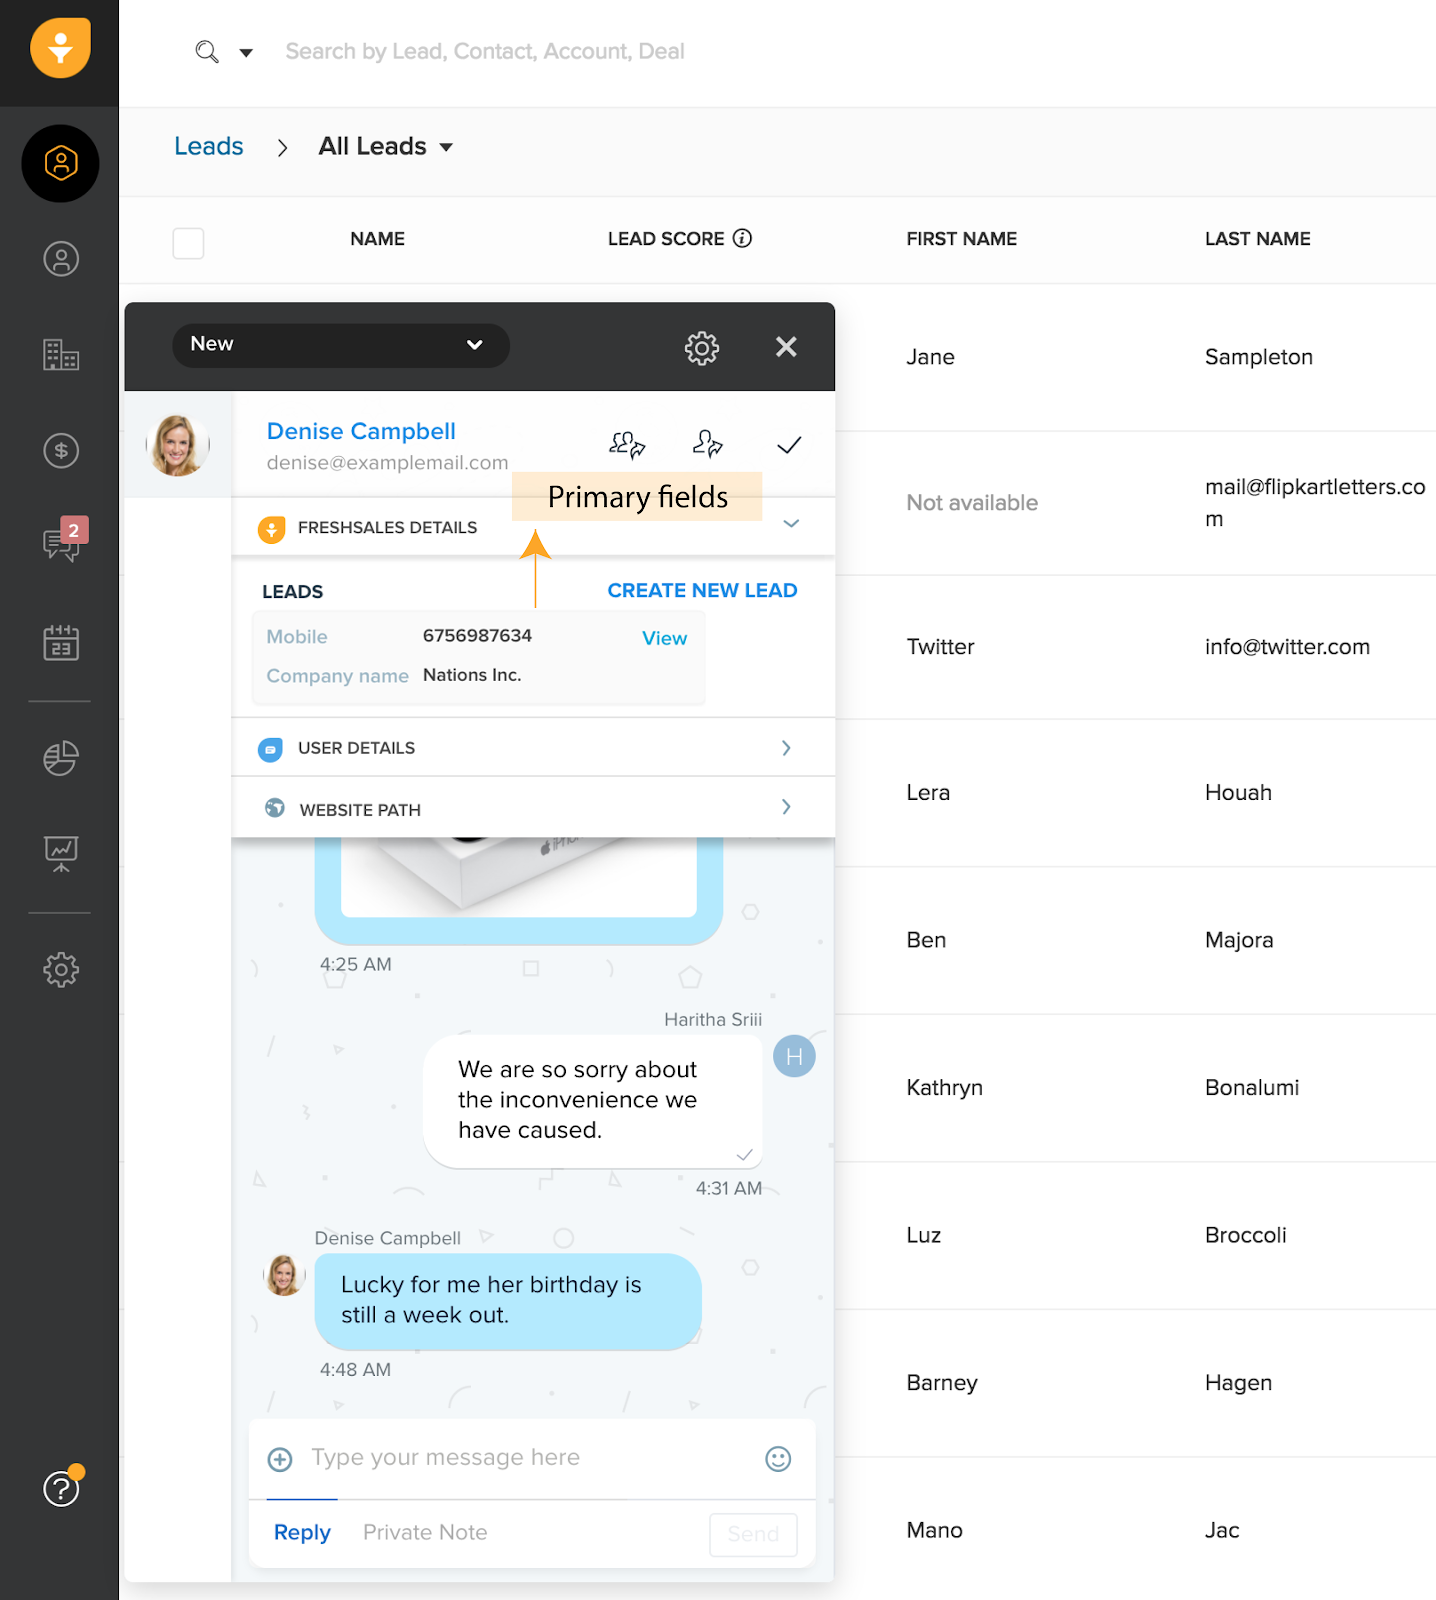
Ex: Say you have a new chat from Denise. Her phone number and Company are details you’d like to see on the click of her name in the chat widget. Add them as Primary fields.
On clicking Denise’s name in the chat widget, this is how her details look:
(b) Other fields: To view more details(apart from Primary fields), add them under Other fields.
(c) Auto-creation of Lead or Contact: Enable this toggle to automatically add those who’ve engaged through Freshchat as Leads or Contact inside Freshsales.
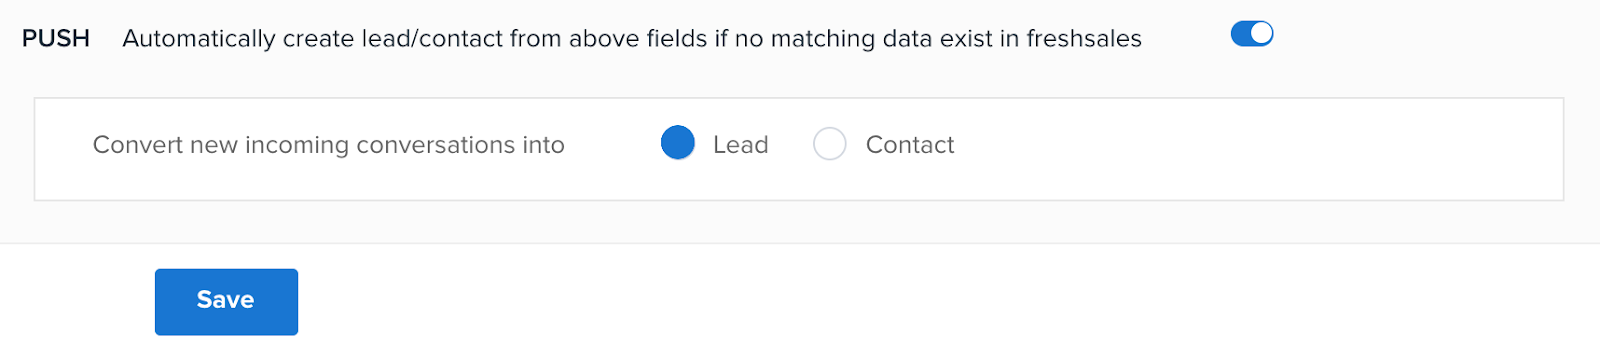
You can choose to either add them as Leads or Contacts. By default they are
added as Leads.
By default when a new lead is created, the following fields are updated in the Lead:
- First name
- Last name
- Phone
- Source with value: ‘chat
So, you can now filter by Source=chat to view all Leads created via Freshchat.
9. Finally, Save your settings.
From now on, for every new chat initiated from your website, the prospects are added as Leads(or Contacts) in your Freshsales account.
How to use this integration as a sales rep?
Once Freshsales account Admin configures this integration, his sales team can go onboard and start using it.
Who could use this?: Each sales rep should have a separate Freshchat login to attend to chats from Freshsales.
Logging in:
- Login to Freshsales > Click the Freshchat icon on the global nav.

- Freshchat widget opens up.
- Log in with your Freshchat credentials.
Receiving and responding to the chats:
- Every time a new chat is initiated by a prospect who is online from your company’s website, you are notified in Freshsales.
- On clicking the notification you can respond right away.
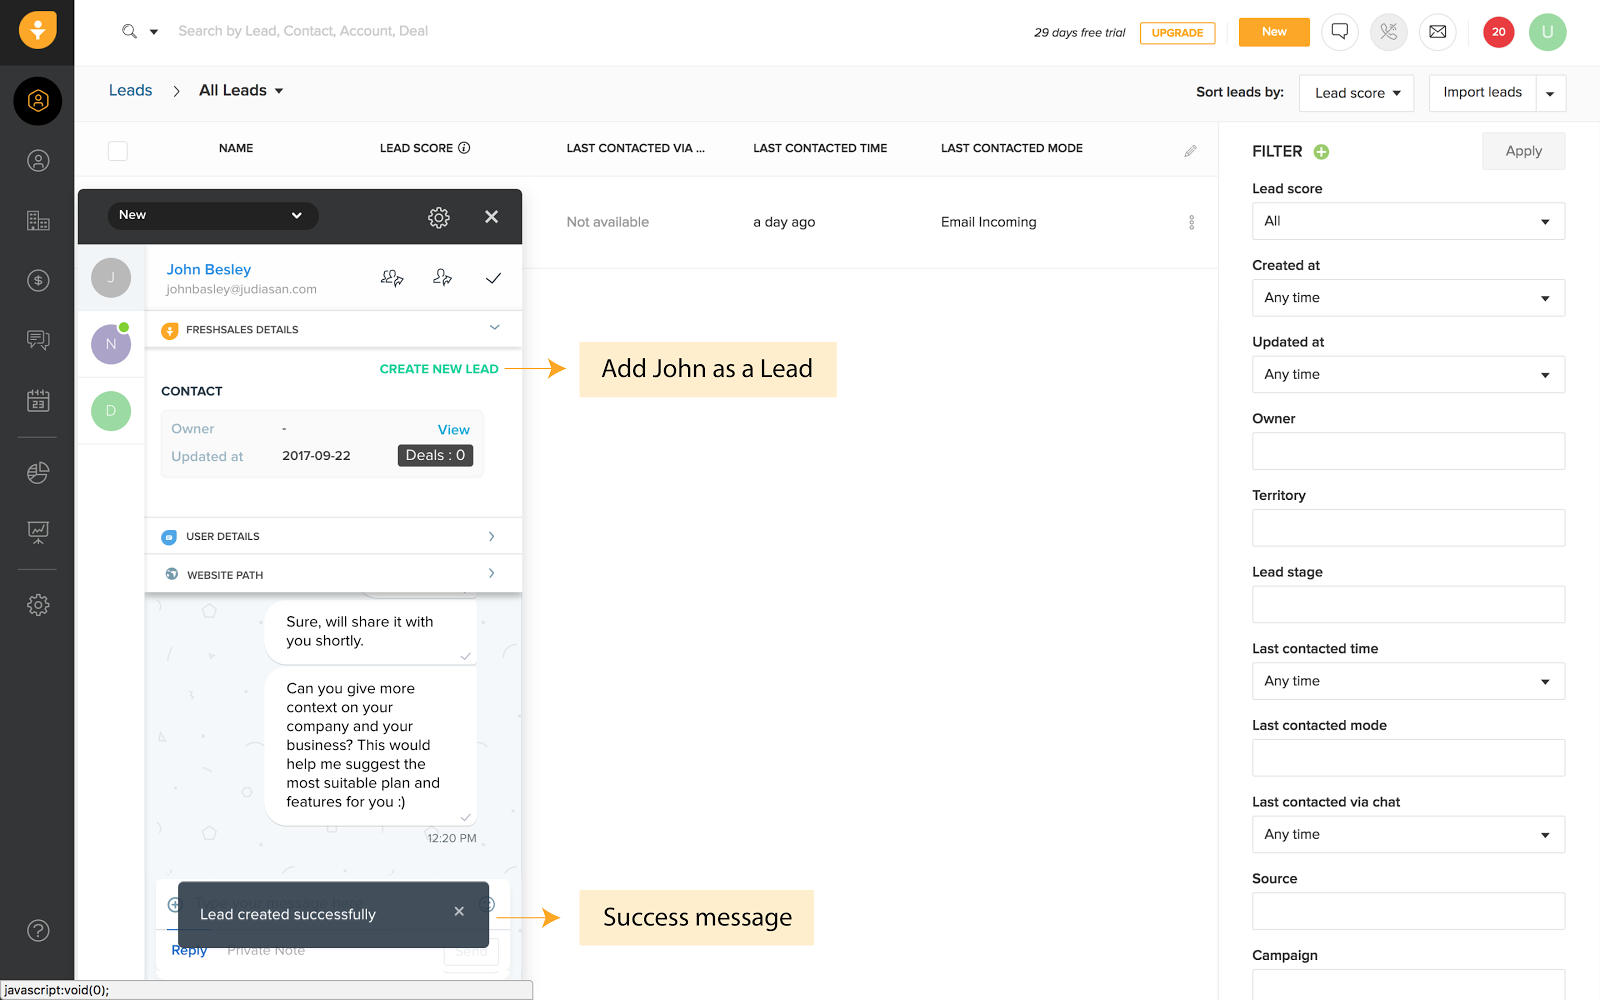
- If your account admin has enabled the auto-create Lead or Contact toggle during integration, every chat visitor is added as a Lead or Contact.
Even otherwise, you can still add them as a Lead or Contact from the chat widget.
You need to,
- Open the chat thread and click the prospect’s name.
- To add the prospect as a Lead, click Create new Lead in the Freshsales details section.
Intelligent Syncing:
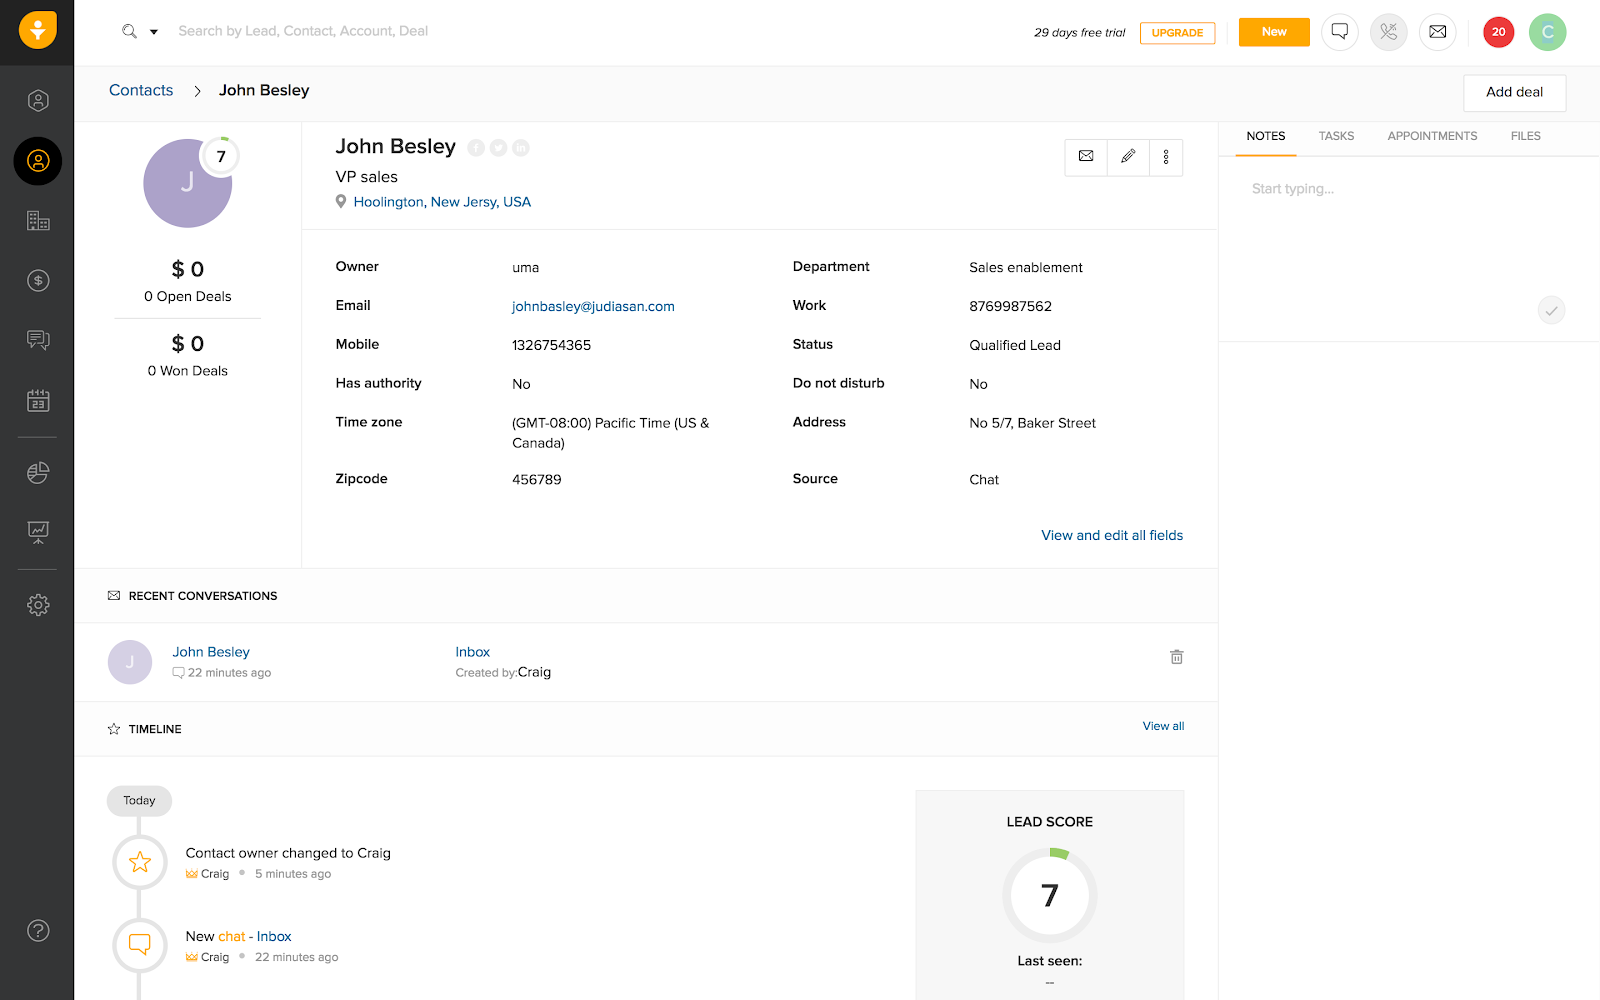
Once you’re done with your conversation, the chat is automatically synced to the Lead or Contact.
How to view chat conversations in Freshsales?
- Every chat conversation with a particular Lead or Contact is automatically listed under Recent Conversations section.
- You can click on the chat conversation to view the entire thread.
Note: Each channel’s, (i.e sales, support or marketing) chat thread is listed as a separate conversation under this section.
How to go offline?
To solely work just with Freshsales for some time, you can go offline.
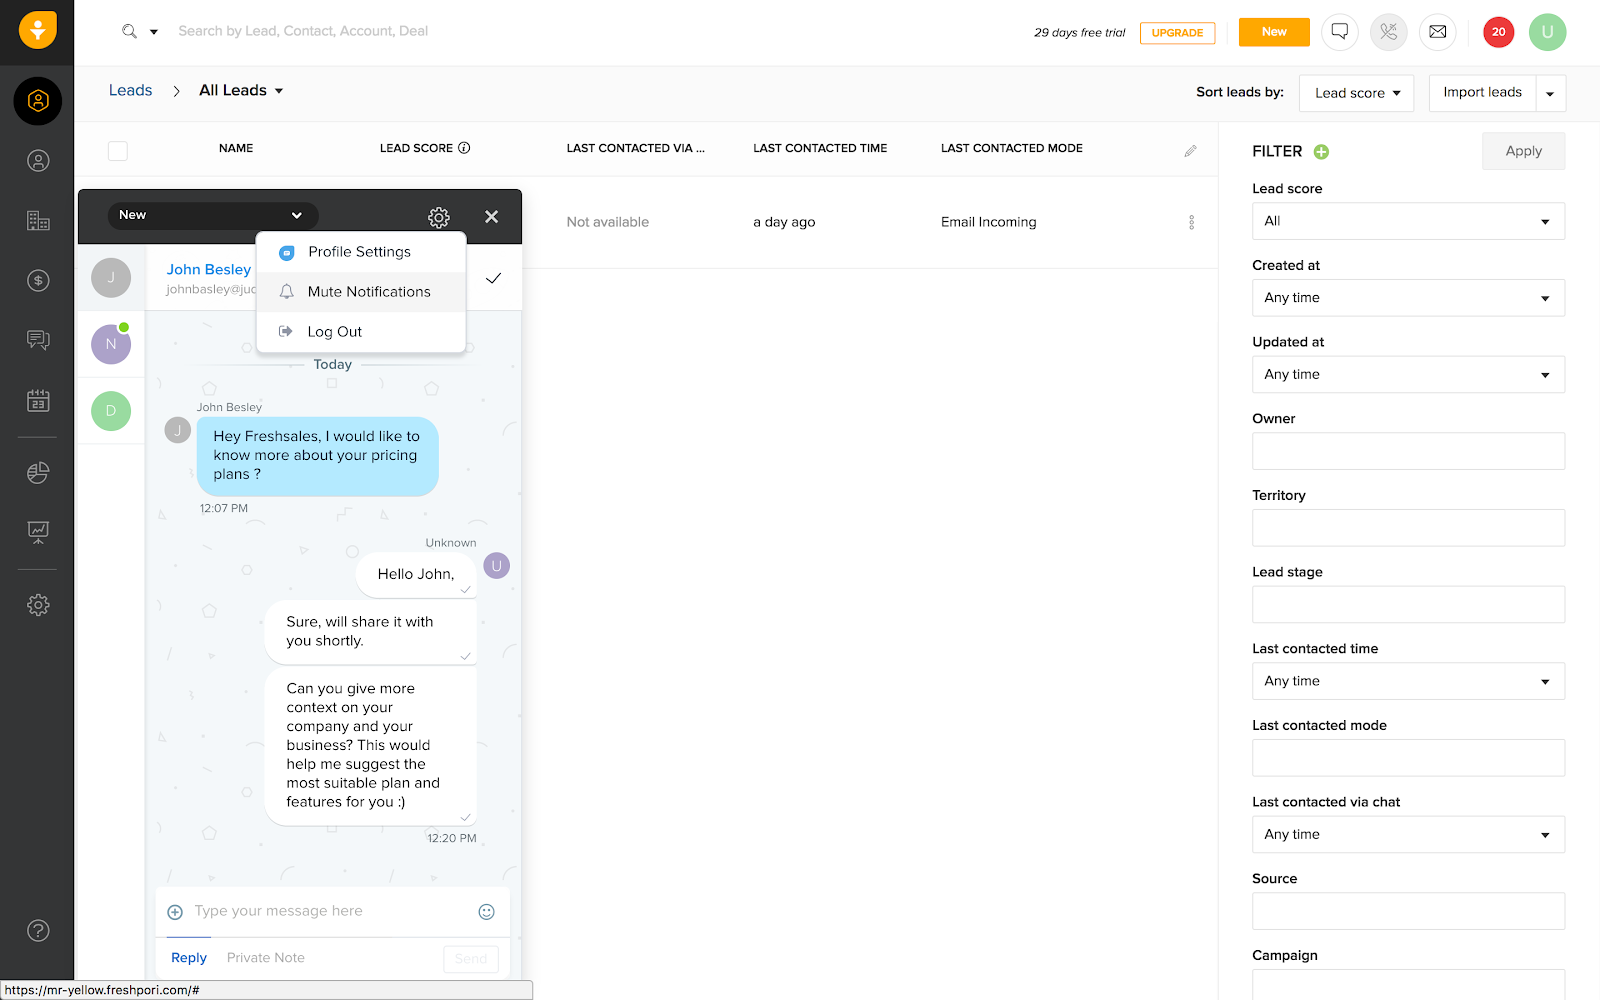
- Click the Settings icon in the Freshchat widget.
- Disable the Intelliassign toggle.
- You are offline now. You won’t be assigned any new incoming chats.
Note: If you are not Freschat’s Estate user, you will have to log out from Freshschat to go offline.
Click Settings > Log out to do so.
How to Mute notifications?
When you are on a call and can’t attend to incoming chats right away, just mute it for then and come back to it later.
- Click the Settings icon in the Freshchat widget.
- Select the Mute notifications option.
Now you will not be notified on new incoming chats. But you will still be seen as being online and can respond to chats later.
How to disable the integration?
- Go to Admin settings > Integrations > Third party integration > Freshchat.
- Click the Disconnect option. You are directed to the Freshsales integration page in your Freshchat account.
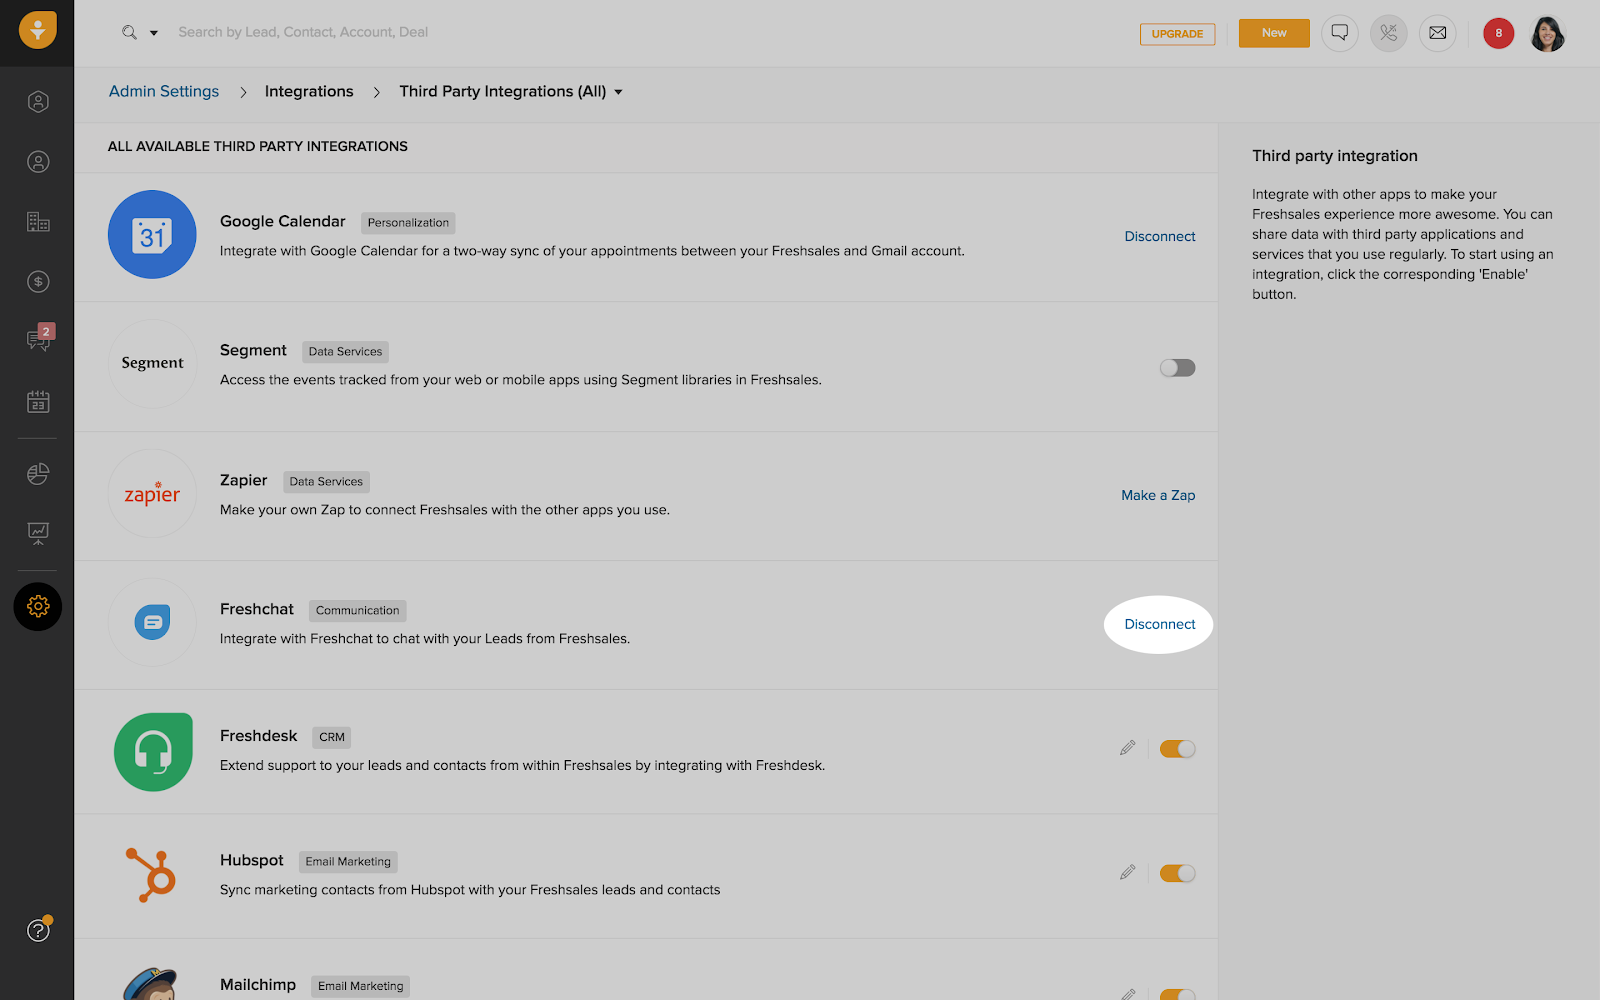
- Click the Edit Authorisation button seen at the top right corner of the page.

- In the Authorize Freshsales page, click Delete to disable the integration.