MailChimp is an email marketing tool used to send out newsletters, campaigns and other marketing activities. With this integration, all contacts or members of your MailChimp campaigns can be imported into Freshsales as leads or contacts. Also, it works the other way around, i.e. Leads or contacts from Freshsales can be imported as members into MailChimp too.
There are a few pre-requisites:
Only a Freshsales administrator can enable this integration.
Also, a MailChimp API key is mandatory.
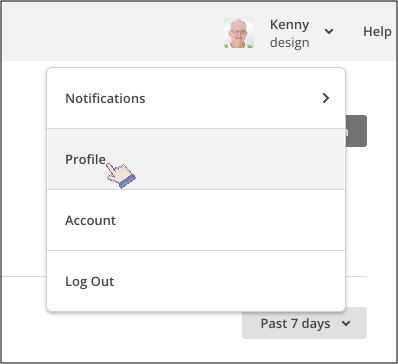
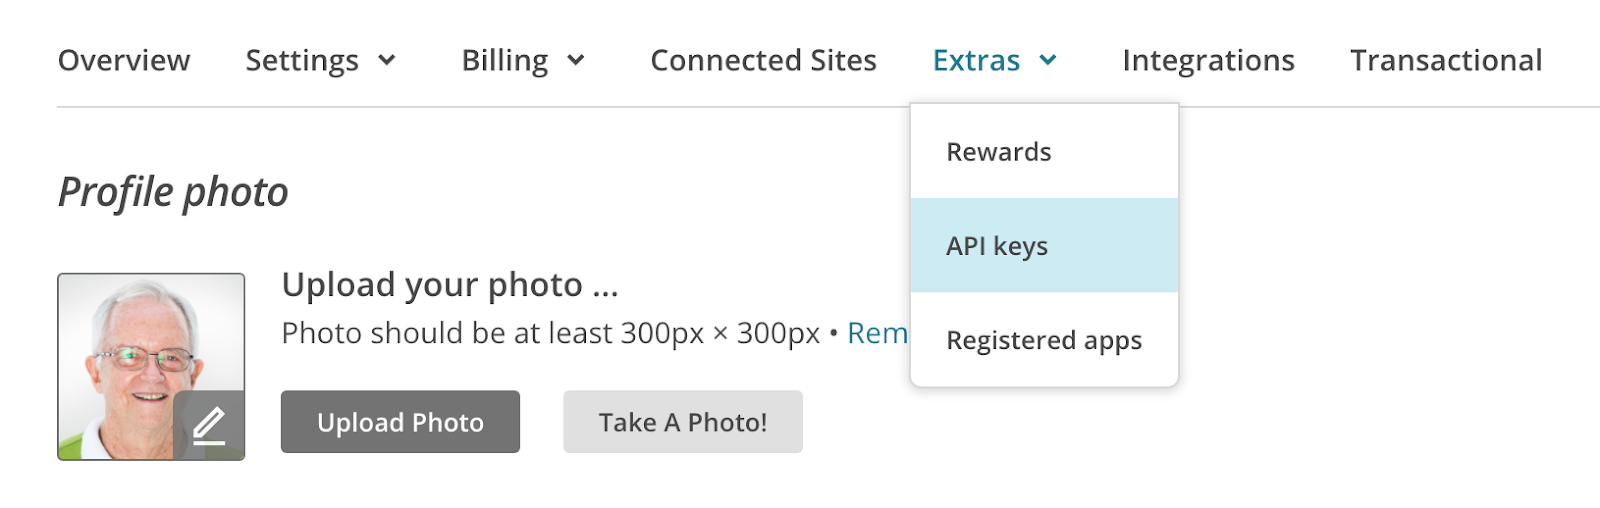
Note: To access your MailChimp API key,
|

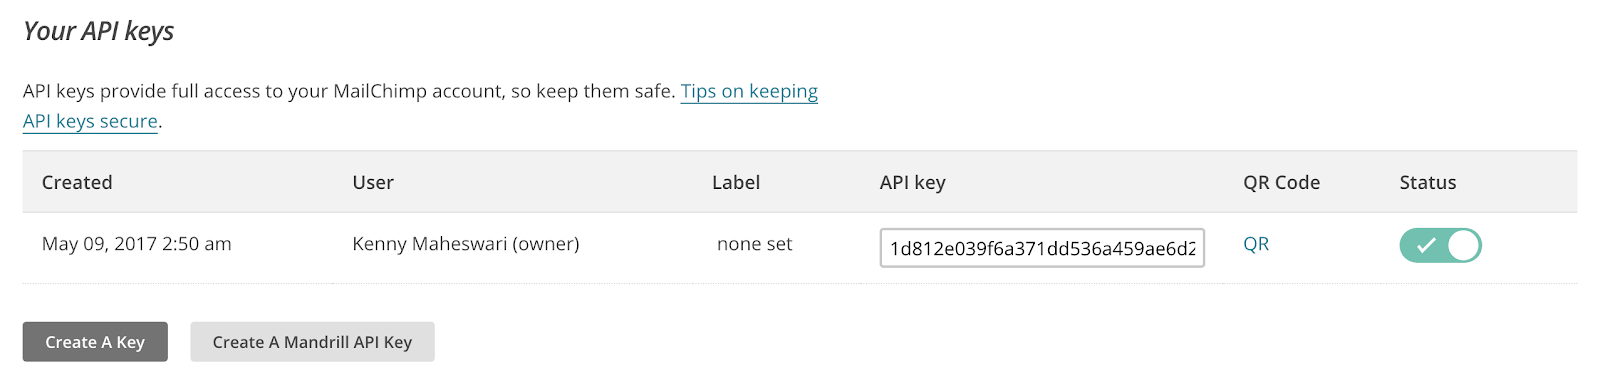
Note: Please use an Admin API key with global access. |
To enable this integration,
Login as an Administrator.
Go to Admin Settings > Integrations > Apps
Click MailChimp integration.
To successfully connect and sync Freshsales with MailChimp, follow these four discrete steps.
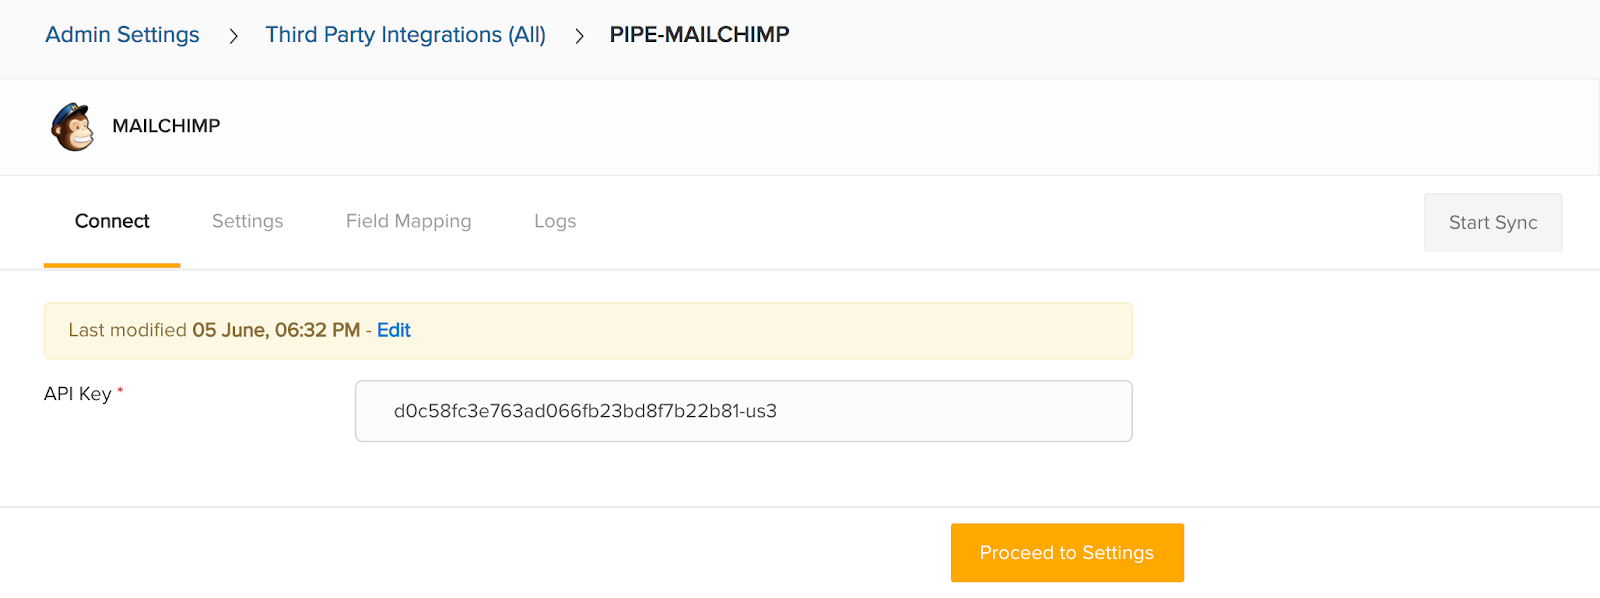
Connect: Enter your API key and hit Proceed to settings button.
Settings:
1. Choose an entity from the Freshsales entities to be synced dropdown. Only leads,
contacts or both leads and contacts are synced based on your selection.
2. Choose a campaign mailing list from the MailChimp lists drop down to sync members
of that list with Freshsales.
3. This sync takes place only twice a day.
4. Choose if you want a,
- 2-way sync: Leads/contacts’ information from Freshsales gets updated in
MailChimp. Also, MailChimp members’ information gets synced to Freshsales.
- 1-way sync: Freshsales entity to Mailchimp members
MailChimp members to Freshsales entity
5. All the above settings lets you update and sync existing records only.
6. Enable the Create a Freshsales Lead/Contact when a new Member is created in
MailChimp toggle to additionally import new members from MailChimp as leads or
contacts into Freshsales.
7. Finally Save these settings.

3. Field Mapping:
This section let’s you personalize the direction of sync, be it a lead or a contact sync.
By default, the direction of all fields is set based on the sync direction you choose in the
Settings tab.
If you opt for a 2-way sync, but want certain fields to be synced only in a single
direction(either from Freshsales to MailChimp or MailChimp to Freshsales), you can do
so here.
To change the direction of sync at field level,
1. Click the leads or contacts section based on the type of sync you’ve chosen. For
Both leads and contacts type sync, make changes in both the sections.
2. Three columns listing,
- All Mailchimp fields
- All Freshsales fields
- Sync update: Indicating the direction of sync for the corresponding field
appears.
3. Click the Sync update dropdown. Choose from the options that appear.
4. All mandatory fields need to be mapped.
5. If you don’t want a field to be synced, leave it empty (unmapped).
6. To add a new field(in Freshsales or MailChimp) and then map the field,
- Click Save mapping button to save the current changes.
- Go to the corresponding products and create the new fields.
- Now in the Field Mapping tab, click Refresh field list button.
- All the newly created fields get listed too.
7. Change the field mapping and direction of sync to suit your requirement.
8. Hit Save Mapping.
9. Finally Start sync to complete the integration.

4. Logs:
1. The status of you sync appears in this section.
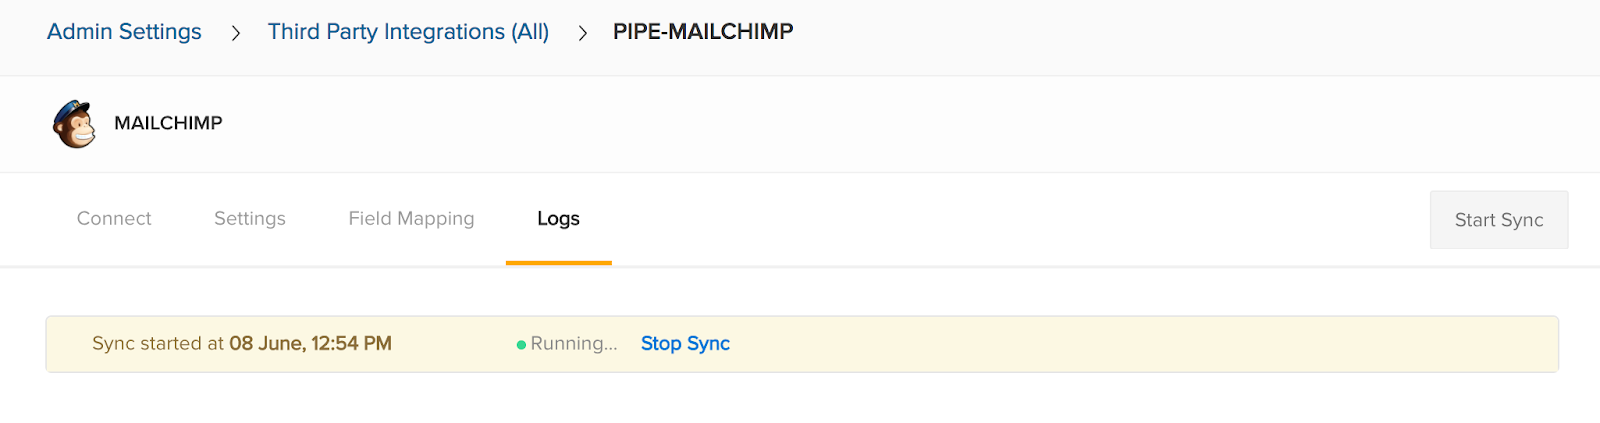
2. Once your sync is complete, details of all entities updated and created in the process
appears as a matrix.
3. Incase of a 2-way sync, logs corresponding to each direction is displayed in detail.