Tags are unique identifiers that allow users to label records and help simplify sorting. Users can create and access tags for any of their records—Leads, Contacts, Accounts, Deals, and Email templates.
By default, tags created by any user will be visible to all users in the CRM. To limit the visibility of tags created by users to only themselves, turn on the ‘Enable private suggestions’ toggle. This ensures that users do not view tags that are created by others as a part of their tag suggestions. For example, a tag called ‘Webinar Lead’ created by User A, will not be visible to User B if ‘Enable private suggestions’ toggle is enabled.
When the above toggle is enabled, you can create and use two types of tags:
Custom tags: These are the tags that can be created by users while adding a tag to a record. To learn how to add and use a custom tag on a record, refer to this article.
Default tags: Tags created by admins from within the Tag settings page are referred to as Default tags and can be identified by the Default label. These tags show up as suggestions for all users when they try to add tags to contacts, accounts, deals, and emails.
How to create a default tag?
To create a default tag,
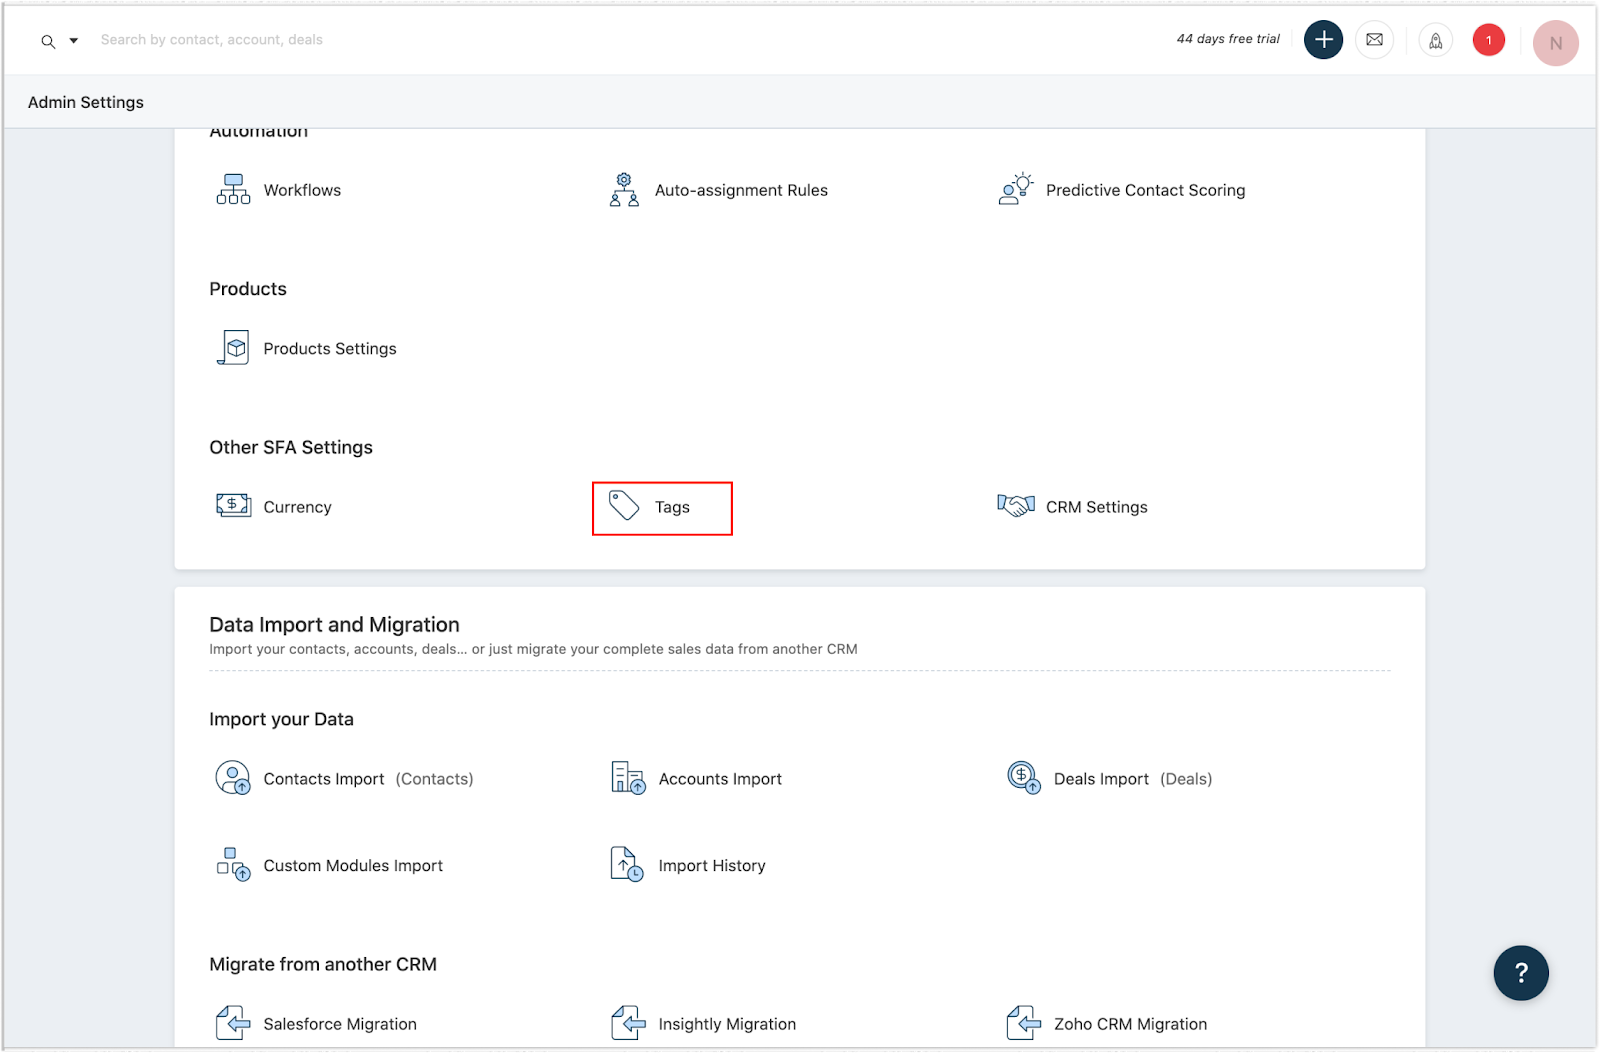
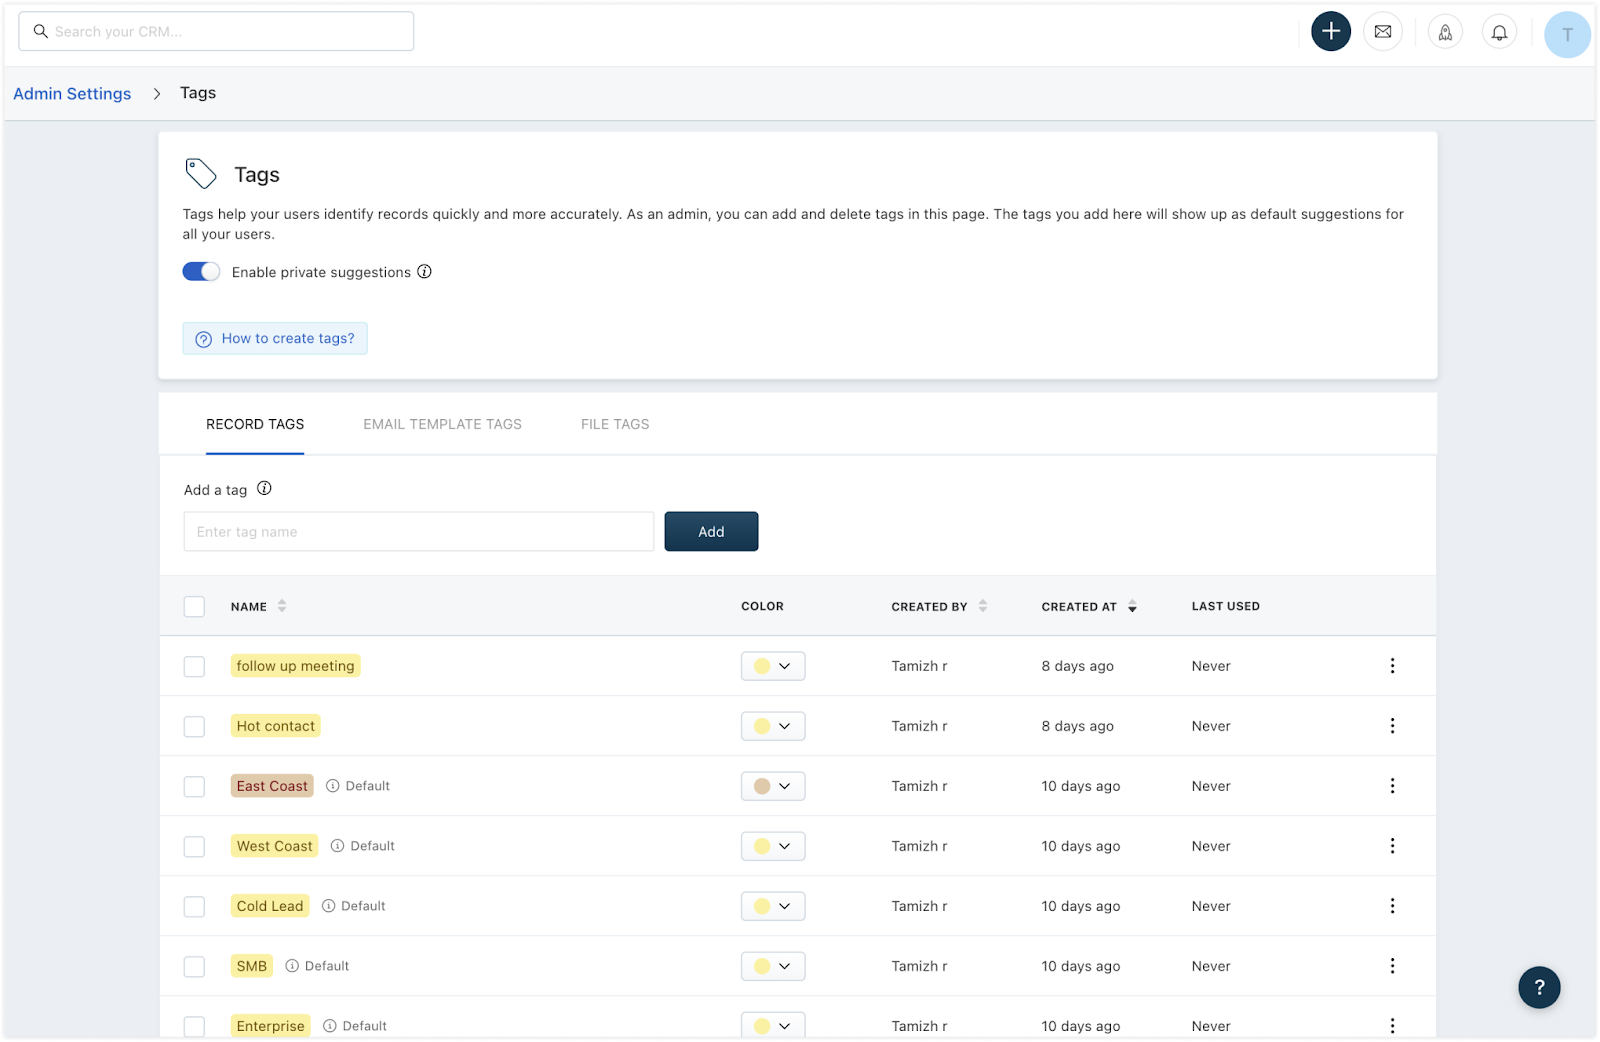
Go to Admin Settings > Tags
In the Tags page that opens up, you have the option to create tags for records (contacts, accounts, and deals) and email templates, and files.
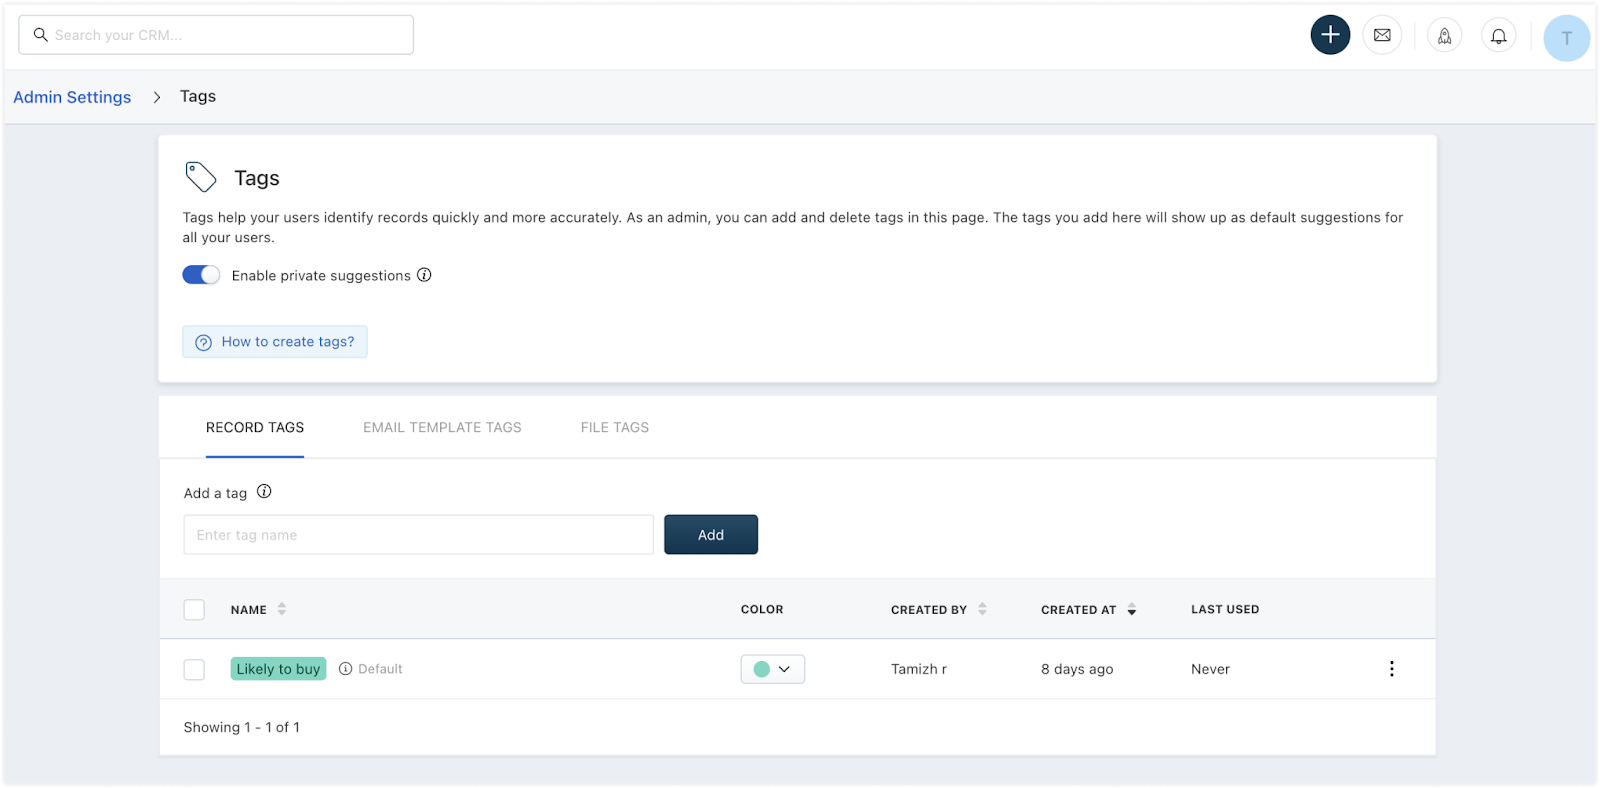
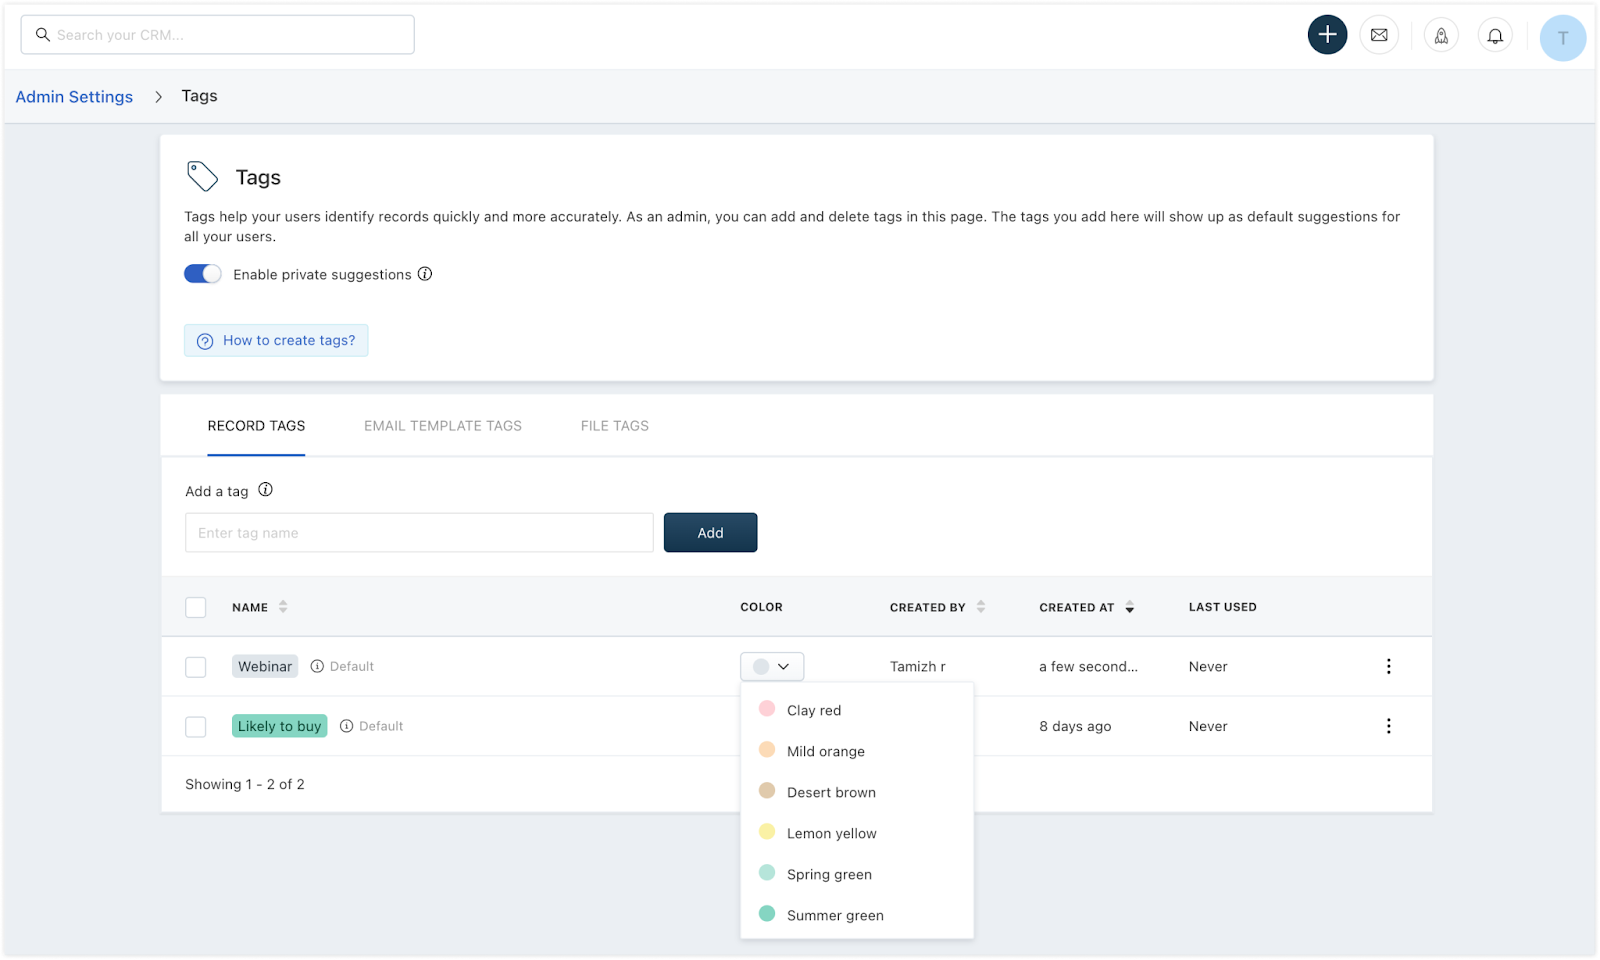
Under RECORD TAGS, enter the name of the tag that you wish to create in the box under Add a tag and click Add
Tags that are created here are considered default tags if the private suggestions toggle is turned on. Once a tag is created, a success notification appears.
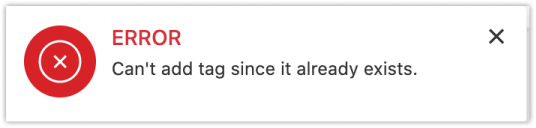
However, if a tag already is present under this name, then you will receive an error notification. Change the name of the tag to make it unique.

Choose the color to which you want to associate the tag from the dropdown under the COLOR column
Note: The tags created for records will not show up as suggestions for email templates/files and vice versa.How to bulk update the color of multiple tags?
To update multiple tags with similar color,
Enable the checkbox in the NAME column

Select the tags you want to bulk update

Pick the color under Change tag color dropdown

The selected tags will now have a similar color. If you don’t want to use colors for your tags, bulk select all tags and change the color back to grey.
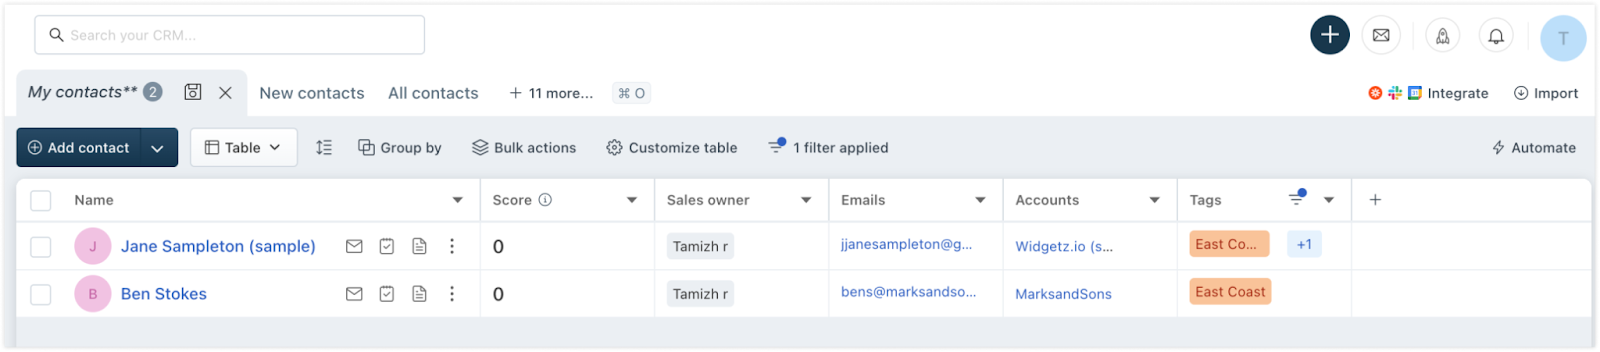
How to view the records associated with a tag?
To view the records associated with a tag, click on the ellipsis icon associated with a tag. This brings up a menu that allows you to filter the different records– contacts, accounts, deals, and emails– based on tags present in the system.
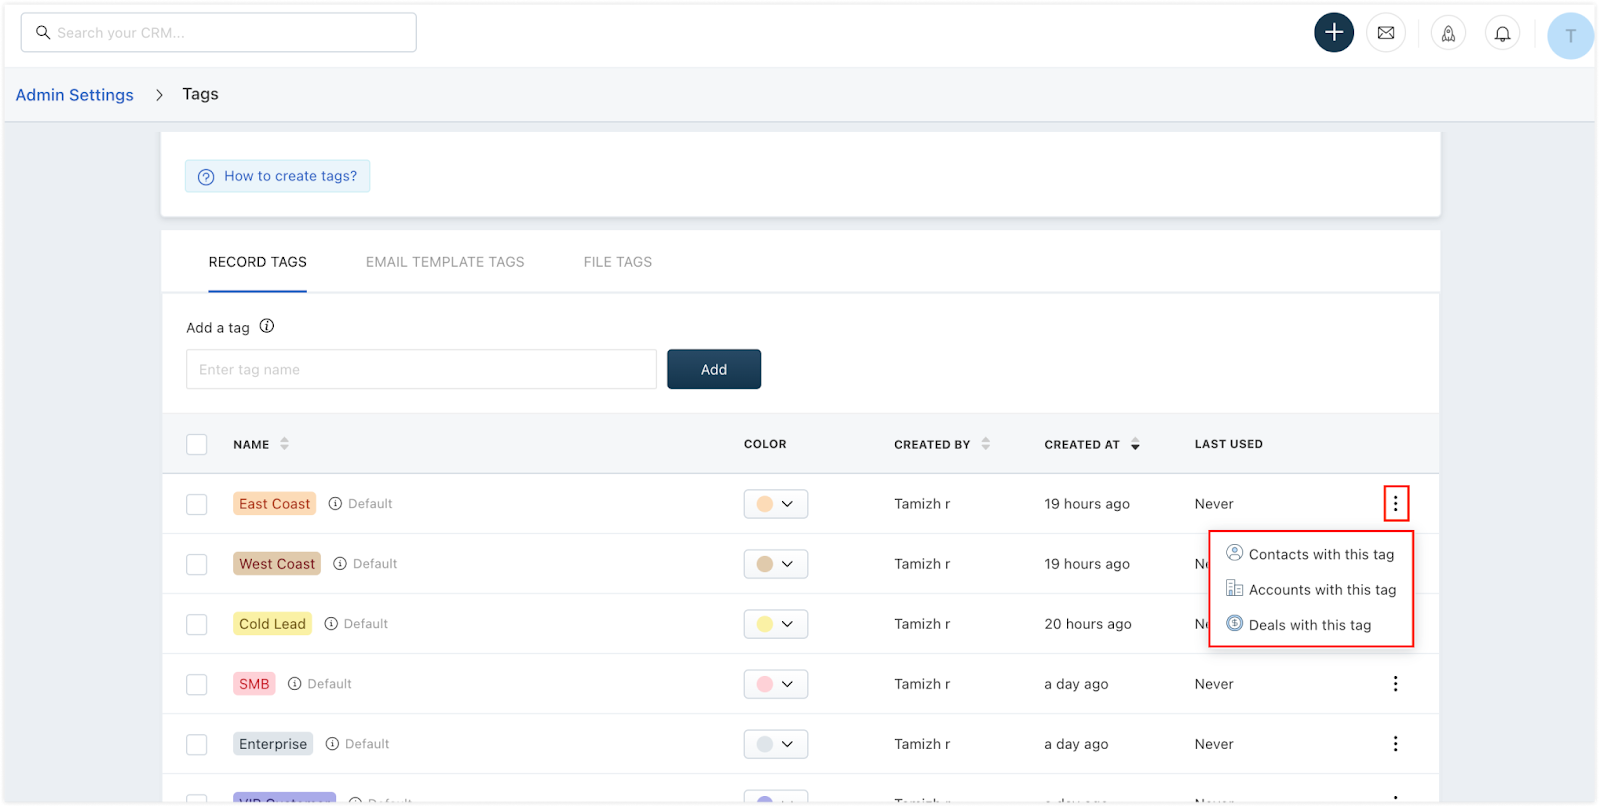
If you’ve selected Contacts with this tag, you will land on the list of contacts associated with this tag.
Note: Records that are present in the recycle bin will not be considered when the filter is applied. Clicking these options opens a separate web page with the tag applied as a filter.How to Delete a tag?
To delete a tag, ensure that the tag is removed from all associated records. Once the tag is removed from all records, click the Delete icon to delete the tag.

Note: Attempting to delete a tag without removing its association with records will result in an error notification. Records in the recycle bin will also need to be disassociated with the tags before a tag can be deleted.
