How is this integration useful?
Integrating your Freshsales and Hubspot account lets you sync, update and helps you transfer Freshsales Leads and Contacts to Hubspot as Contacts and vice-versa instantly.
You may now constantly keep your sales and marketing teams updated and work efficiently.
Before you start with this, look out for these pre-requisites.
Pre-requisites
You need to be an Admin for both your Freshsales and Hubspot account.
Only records with a valid email field get transferred or updated. So, ensure all records, be it Freshsales or Hubspot has an email address associated with it.
Note: Those records without an email address are not synced. They are not listed in the error log either. |
How to enable this integration?
Log in as an Admin into Freshsales.
Go to Admin Settings > Integrations > Third party integrations.
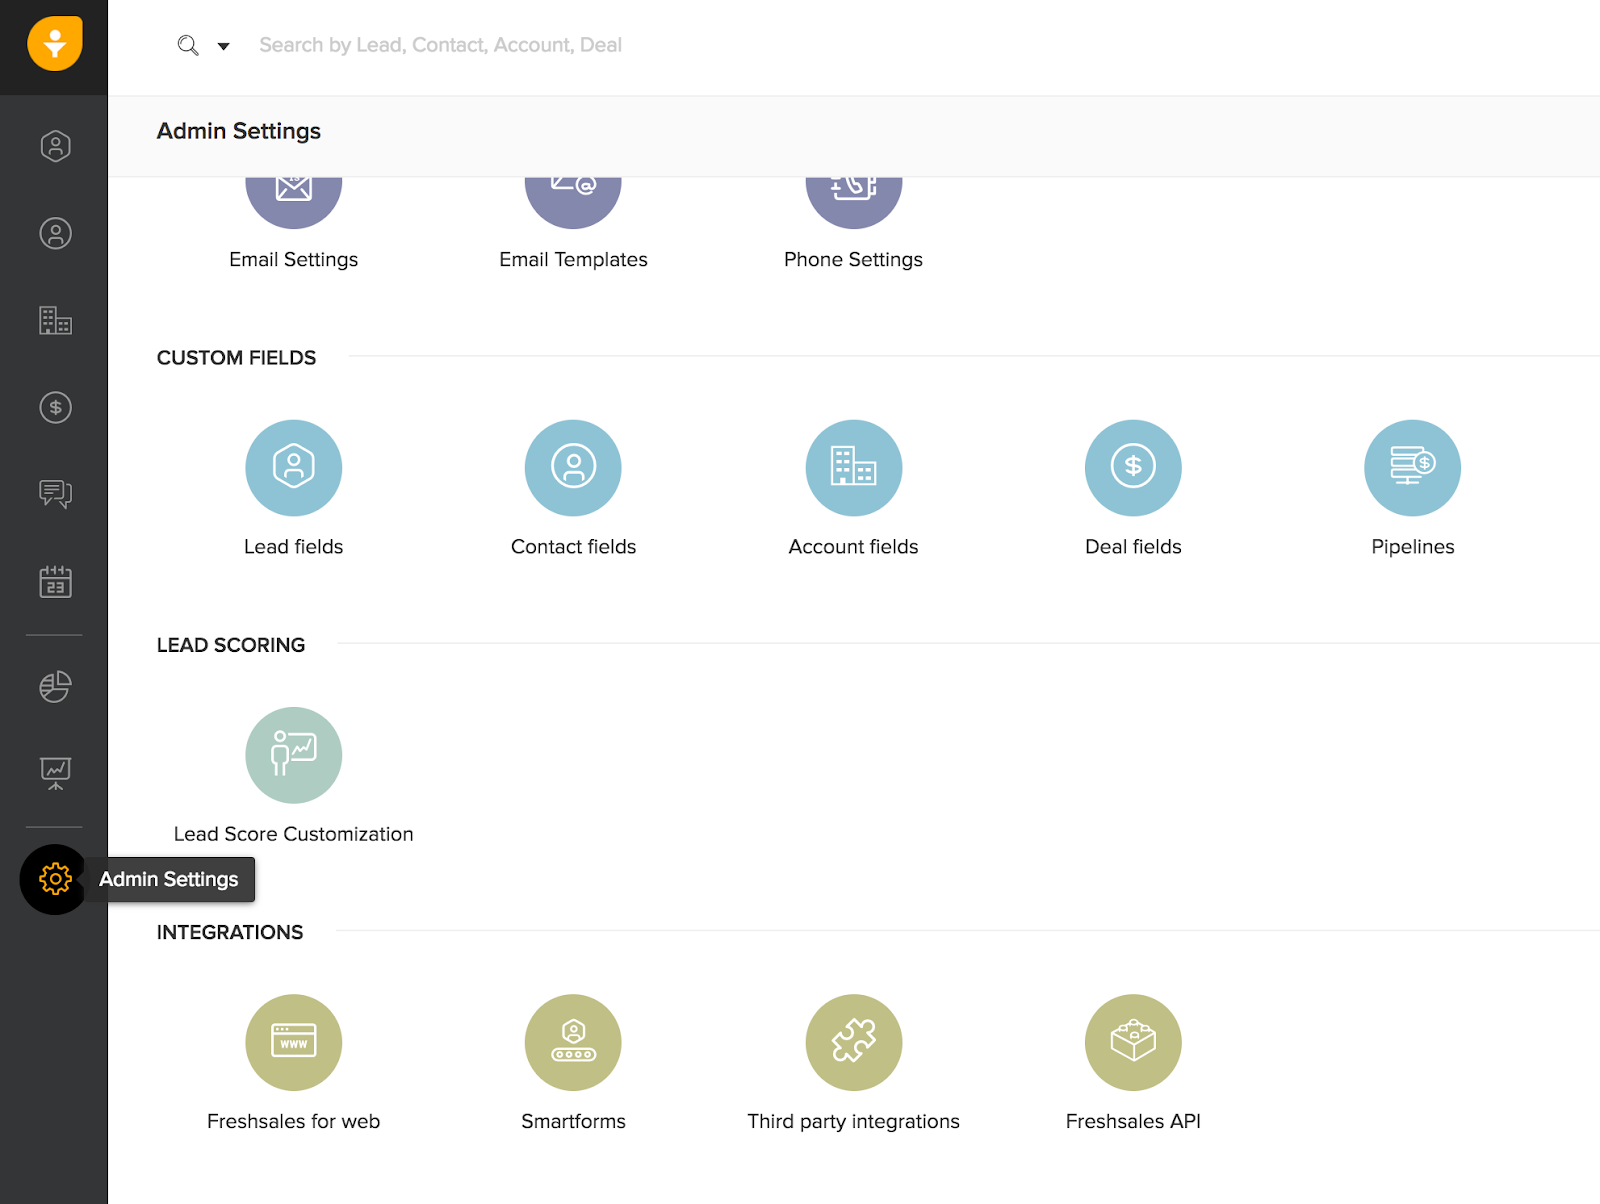
Enable the Hubspot integration toggle.
Once enabled, you are directed to a set of 4 tabs: Connect, Settings, Field Mapping and Logs.
Configure the following four stages to complete the integration,
Connect
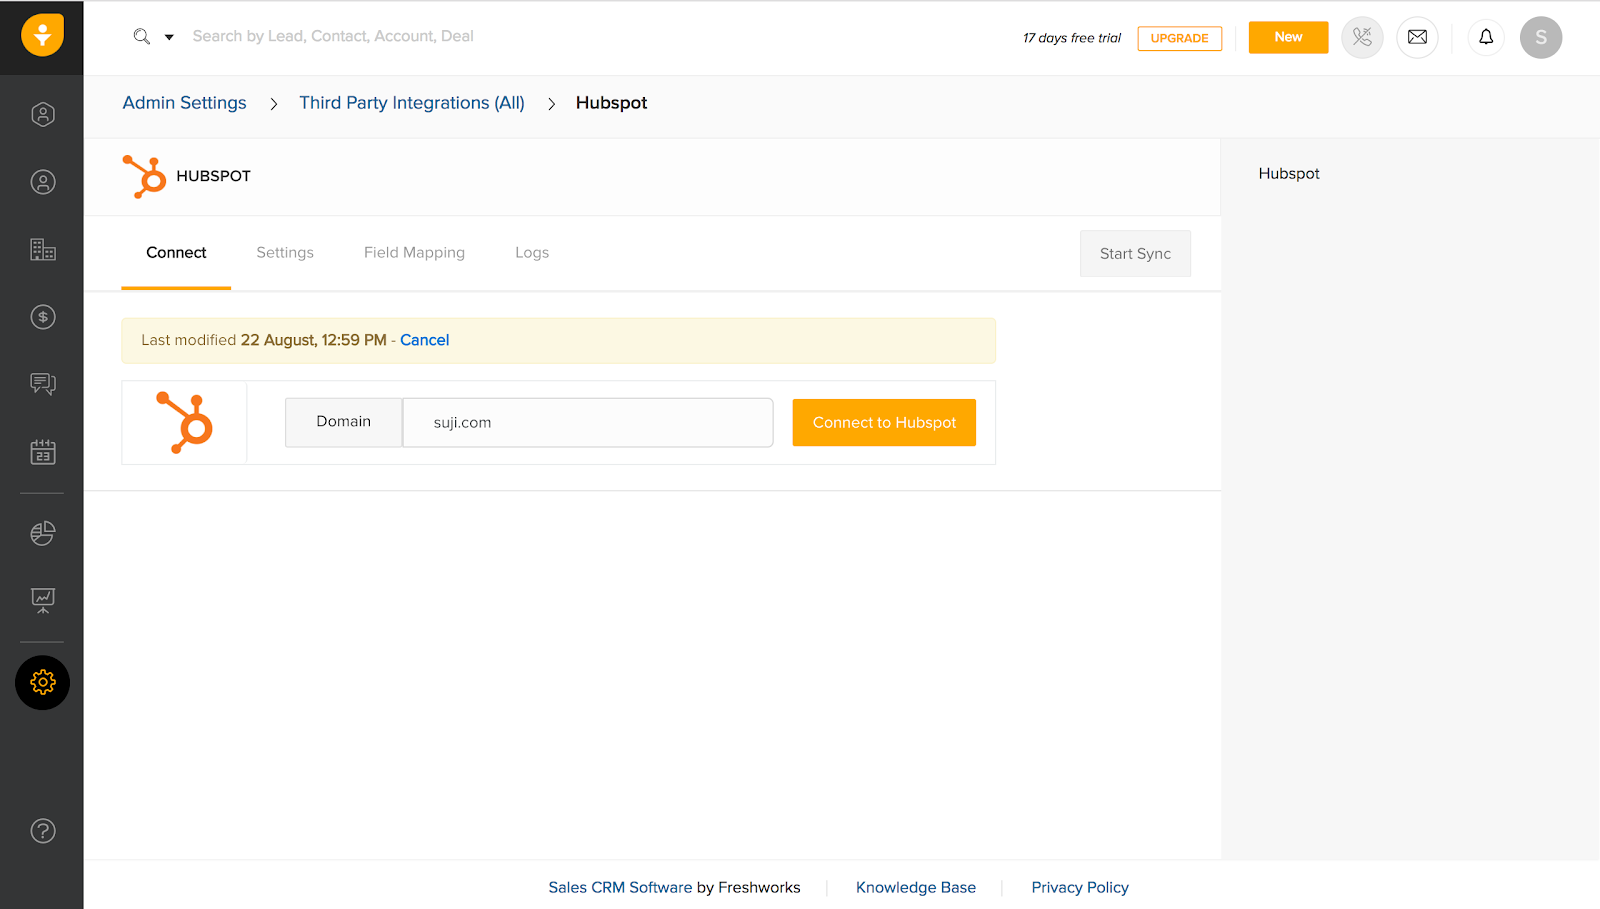
Enter your Freshsales domain name and hit the Connect to Hubspot button.
You are directed to Hubspot. Now log into your account.
You are directed back to the Freshsales-Hubspot integration page.
Settings
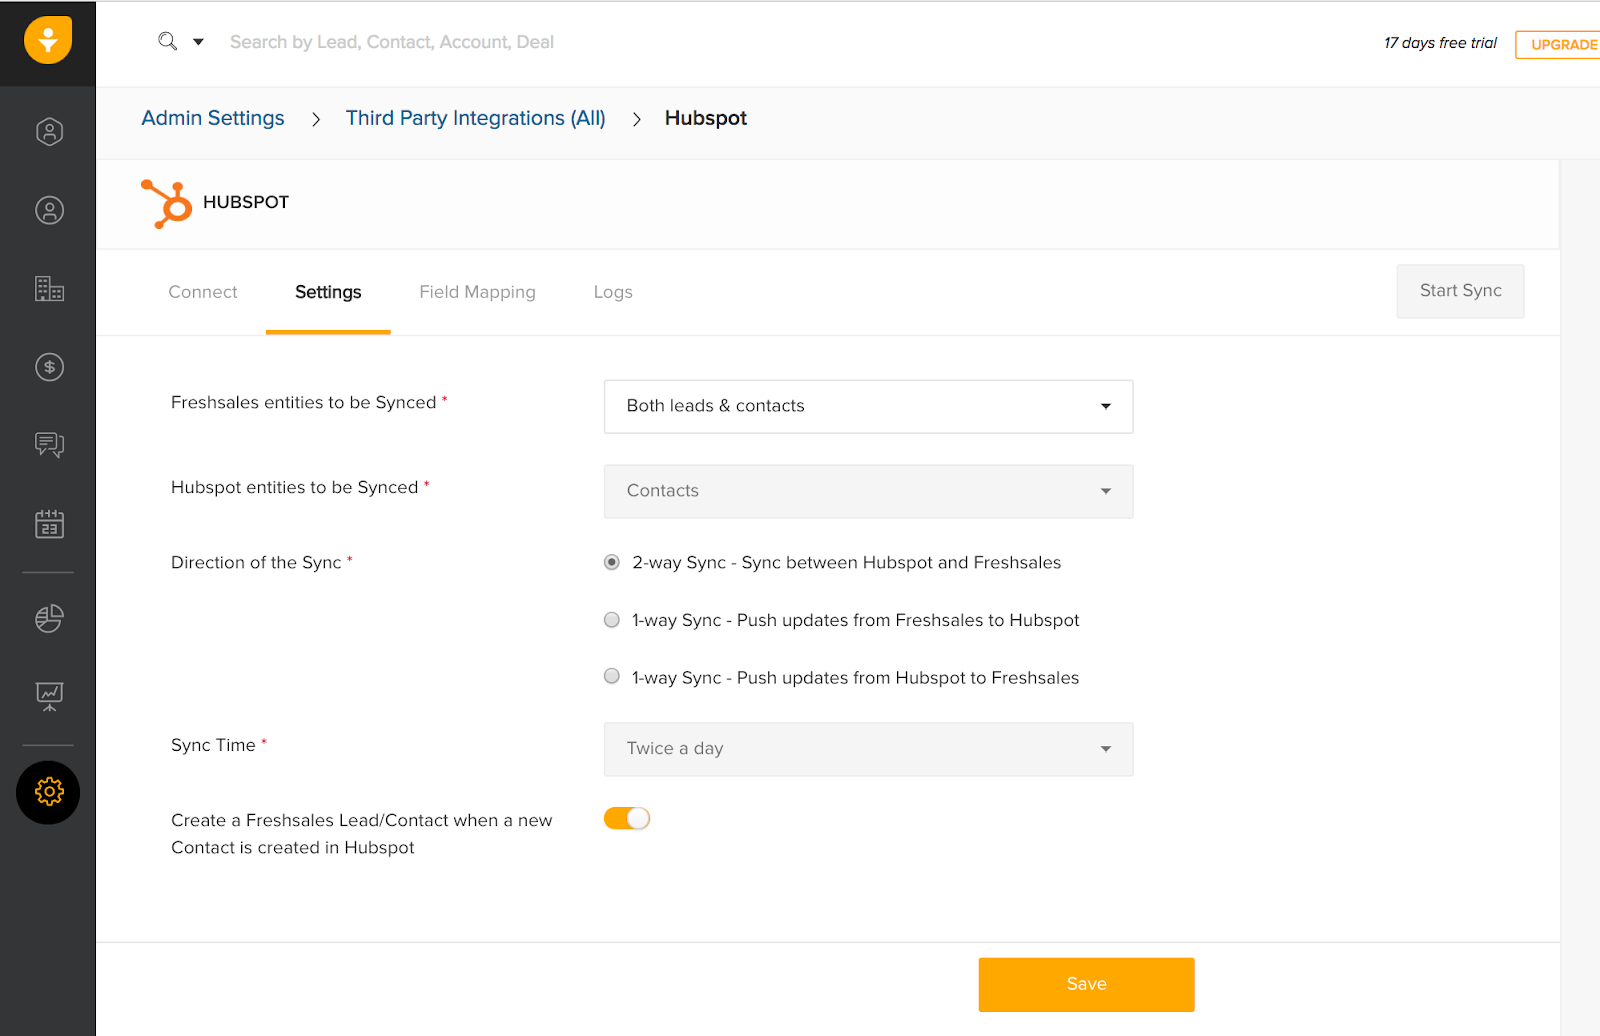
This tab lets you choose two settings primarily:
Entities to be synced:
Freshsales: You may sync your Leads, Contacts or both of them in Freshsales.
Hubspot: You may sync your Hubspot Contacts with Freshsales.
Choose your combination of sync from the Freshsales entities to be synced and
Hubspot fields in this section.
2. Direction of sync: From where - to where
1-way: Freshsales to Hubspot or Hubspot to Freshsales
2-way: Syncs data in both ways simultaneously
3. Also, enable the Create a Freshsales Lead/Contact when a new Contact is created
in Hubspot toggle to additionally import new contacts from Hubspot as leads or
contacts into Freshsales.
Note: When disabled, new records aren’t created. Only existing entities in both accounts are updated with the changes in field values if any. |
4. Finally Save these settings.
Note:
|
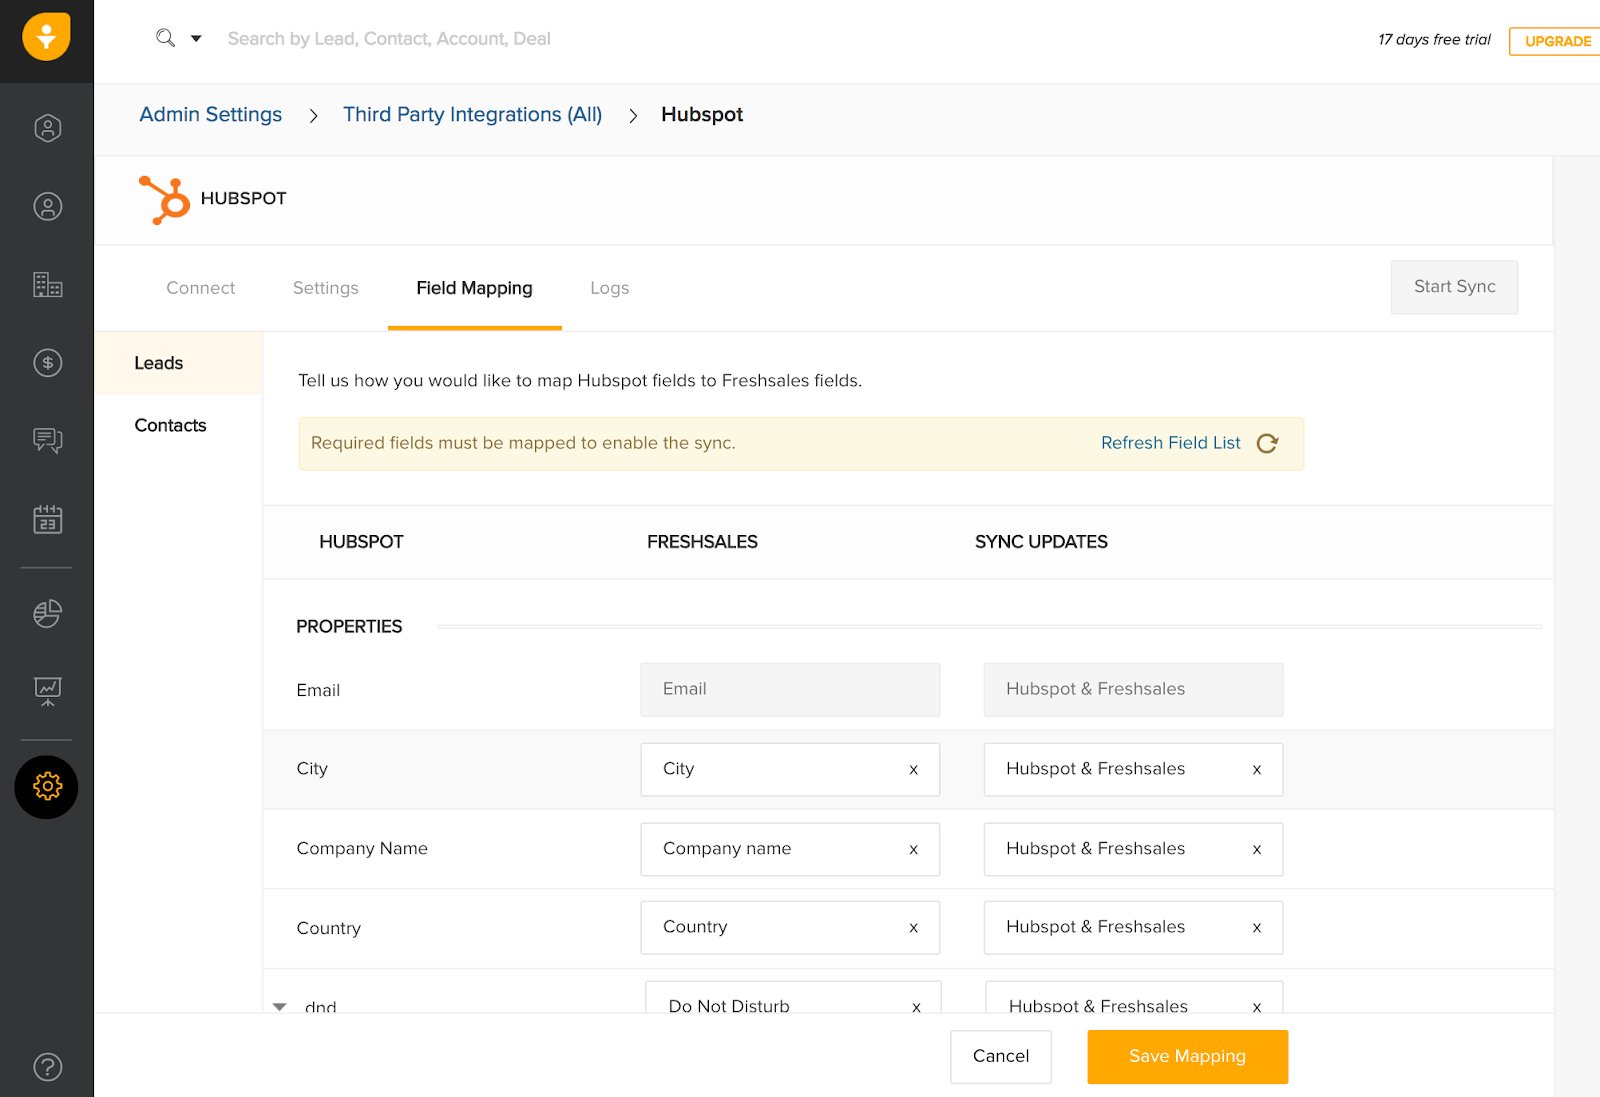
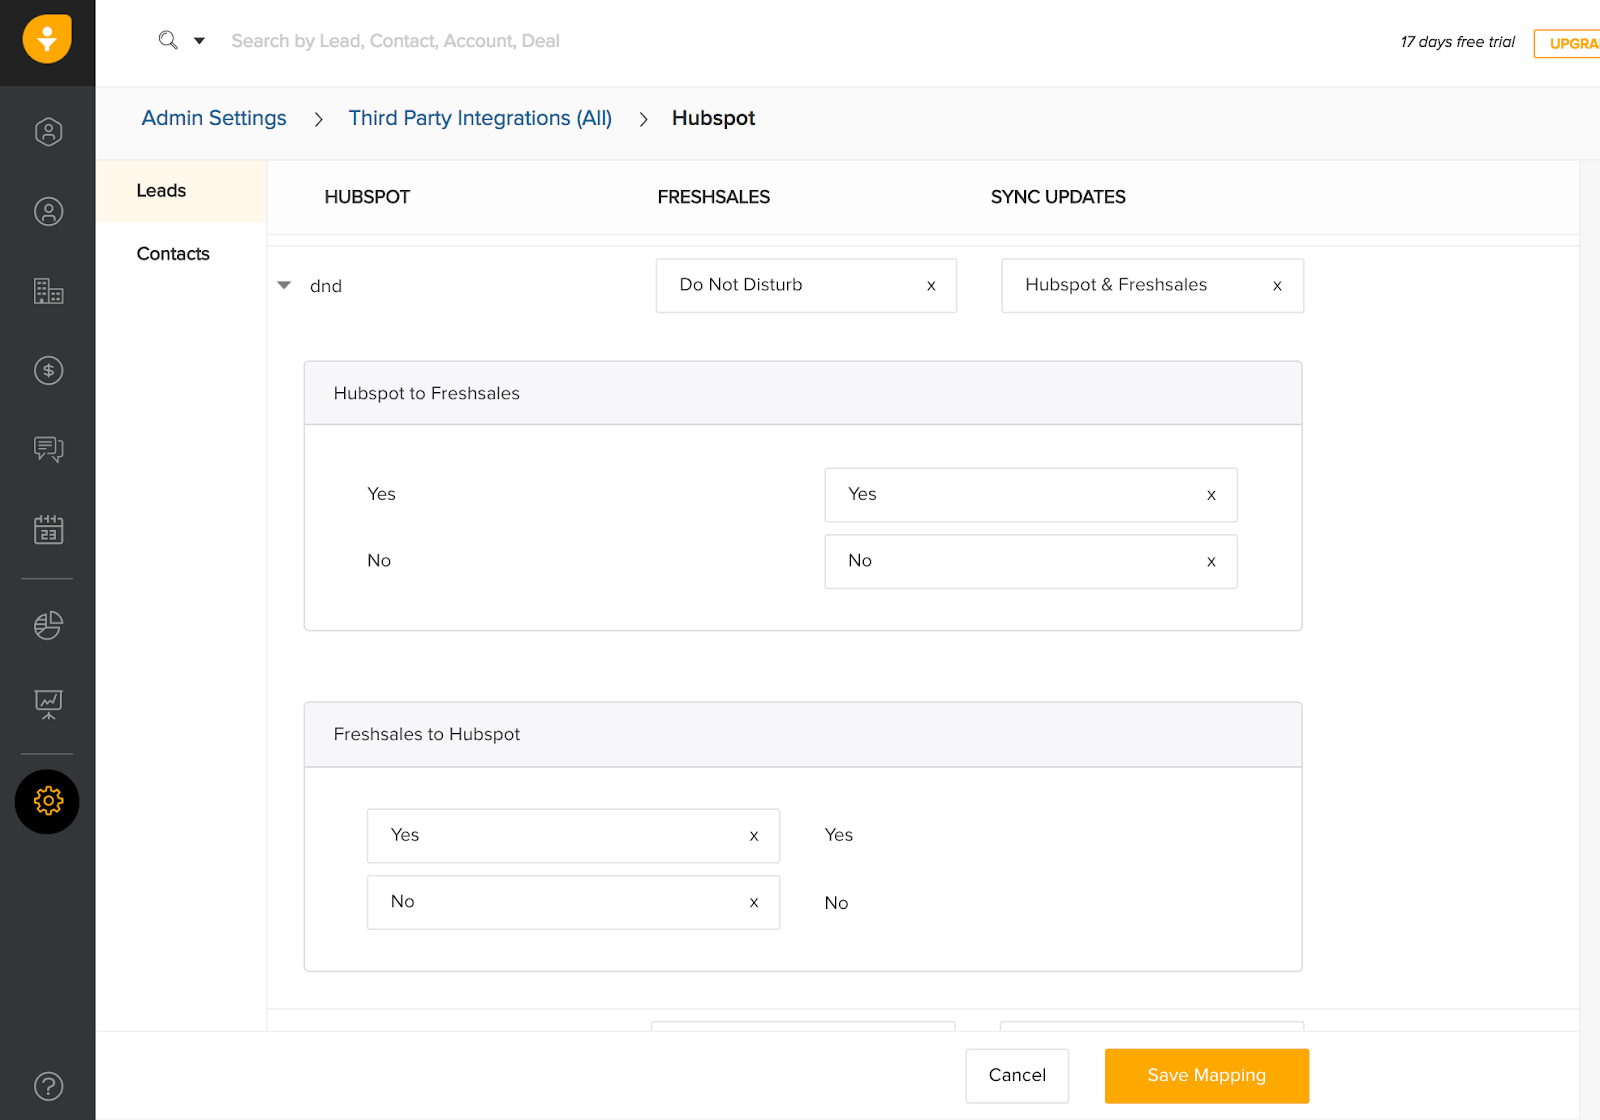
Field Mapping
You may personalize the direction of sync.
By default, the direction of all fields is set based on the sync direction you choose in the
Settings tab.
If you opt for a 2-way sync, but want only certain fields to be synced only in a single
direction(either from Freshsales to Hubspot or Hubspot to Freshsales), you can do
so here.
To change the direction of sync at field level,
1. Click the leads or contacts section based on the type of sync you’ve chosen. For
Both leads and contacts type sync, update field mapping in both the sections.
2. Three columns listing,
- All Hubspot fields
- All Freshsales fields
- Sync update: Indicating the direction of sync for the corresponding field
appears.
3. Click the Sync update drop-down. Choose from the options that appear.
4. All mandatory fields need to be mapped.
5. If you don’t want a field to be synced, leave it empty (unmapped).
6. To add a new field(in Freshsales or Hubspot) and then map the field,
- Click Save mapping button and save the current changes.
- Go to the corresponding product and create the new fields.
- Now in the Field Mapping tab, click Refresh field list button.
- All the newly created fields get listed too.
7. Change the field mapping and direction of sync to suit your requirement.
8. Hit Save Mapping.
9. Finally, Start sync to complete the integration.
Note:
|
Logs
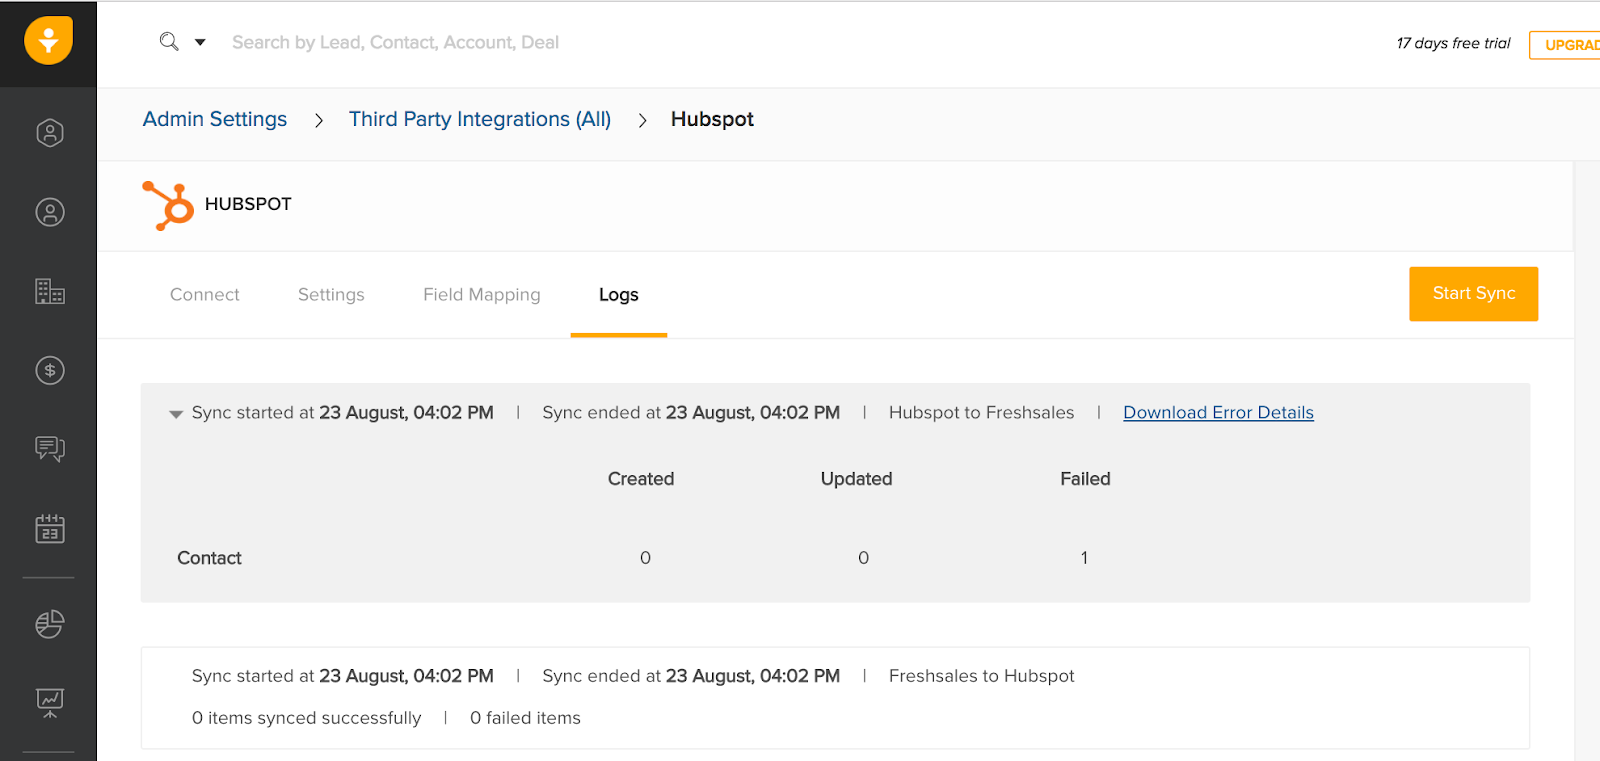
The status of you sync appears in this section.
Once your sync is complete, details of all entities updated and created in the process appear as a matrix.
In case of a 2-way sync, logs corresponding to each direction is displayed in detail.
Note: - You may download your error log as a CSV file and see the specific fields that failed to sync using the Download the error log button.  - Now knowing the errors, you may fix them and sync again to update the failed records. |