You can not only use multiple filters to refine your accounts, but also save them as custom views and share them with your team.
The best part about custom views is that you can edit them, delete them and create as many views as you like with no restrains.
To create a custom view,
Select a view from the accounts list view page and use the filters you need to narrow your list of accounts. If you’d like to add more filters, click the + icon beside Filter accounts by field.
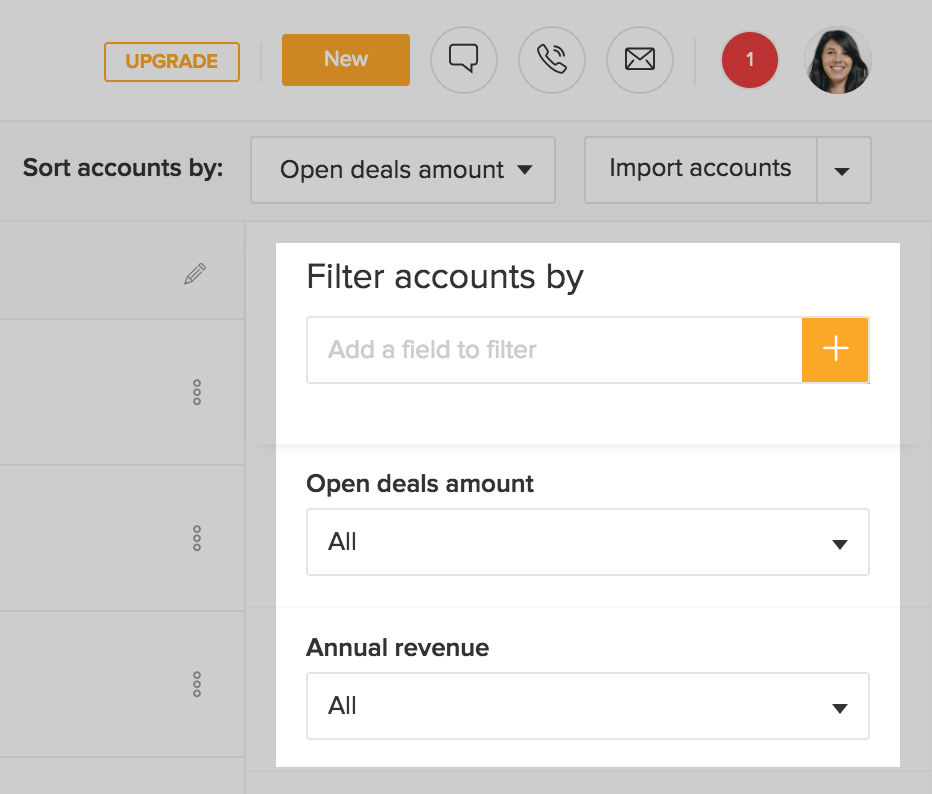
Learn more about adding filter fields from here.
To save your filter criteria as a new view, click the Save view as button(present beside the Filter accounts by field).

In the Save as overlay that pops up, give a name for your view and also choose the visibility(whether or not you want to share the view with your team).

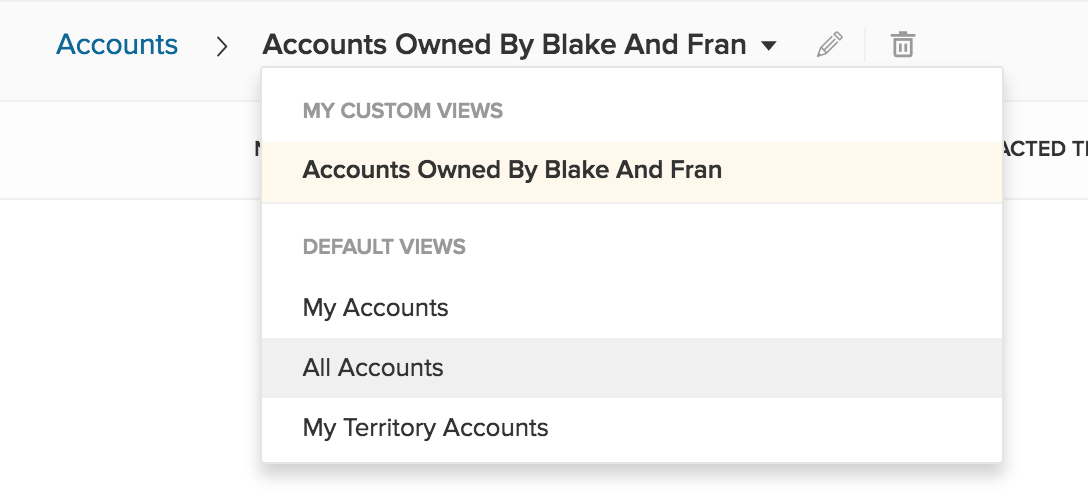
You can find your newly created view under the custom views in the Contact view drop-down.
To update filters used in a custom view,
If you’d like to change the filter criteria in your view, you should select the view from the custom views.
Modify the filter fields by changing the values or by adding a new field. To remove a filter from the view, delete all values of that particular field.
Click Save View button to update the filter criteria of the custom view.
Use Save view as to save as a new custom view.
To rename a custom view,
Select a custom view from the accounts list view page.
Clicking Edit opens the Save As overlay.
You can rename and change the visibility of the view in the Save As overlay. However, Edit does not let you modify the filter criteria used in that view.
